
Even with these improvements, your iPhone’s overall security still largely depends on you — from the security measures you use to how much data you wish to share with Apple and other parties. Because of this, we’ve rounded up the new privacy settings in iOS 12 that you should check, along with settings that have existed since previous versions of iOS that still remain relevant.
1. Use Automated 2FA
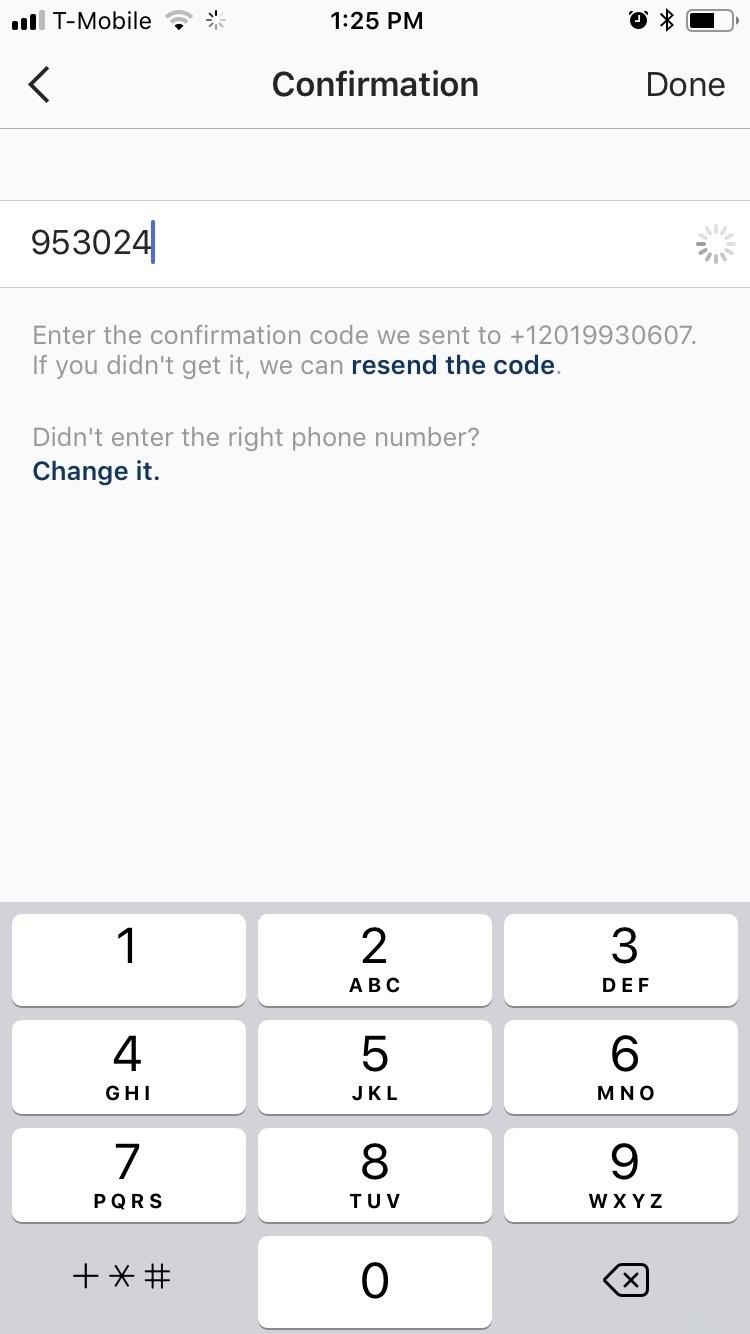
Two-factor authentication, known commonly as 2FA, gives you an added layer of security for apps and other services in the form of a six-digit numeric PIN that’s sent to you via Messages. In the past, you had to retrieve and input a time-sensitive code, which made access cumbersome. To alleviate this, iOS 12 has made 2FA security codes available as AutoFill options.
In other words, you no longer have to jump from a login page over to Messages to retrieve your security code, then back again to type it in. Unfortunately, the auto-fill feature doesn’t extend to external 2FA apps like Google Authenticator, and there’s no concrete information as to whether it’ll be added on with future updates.
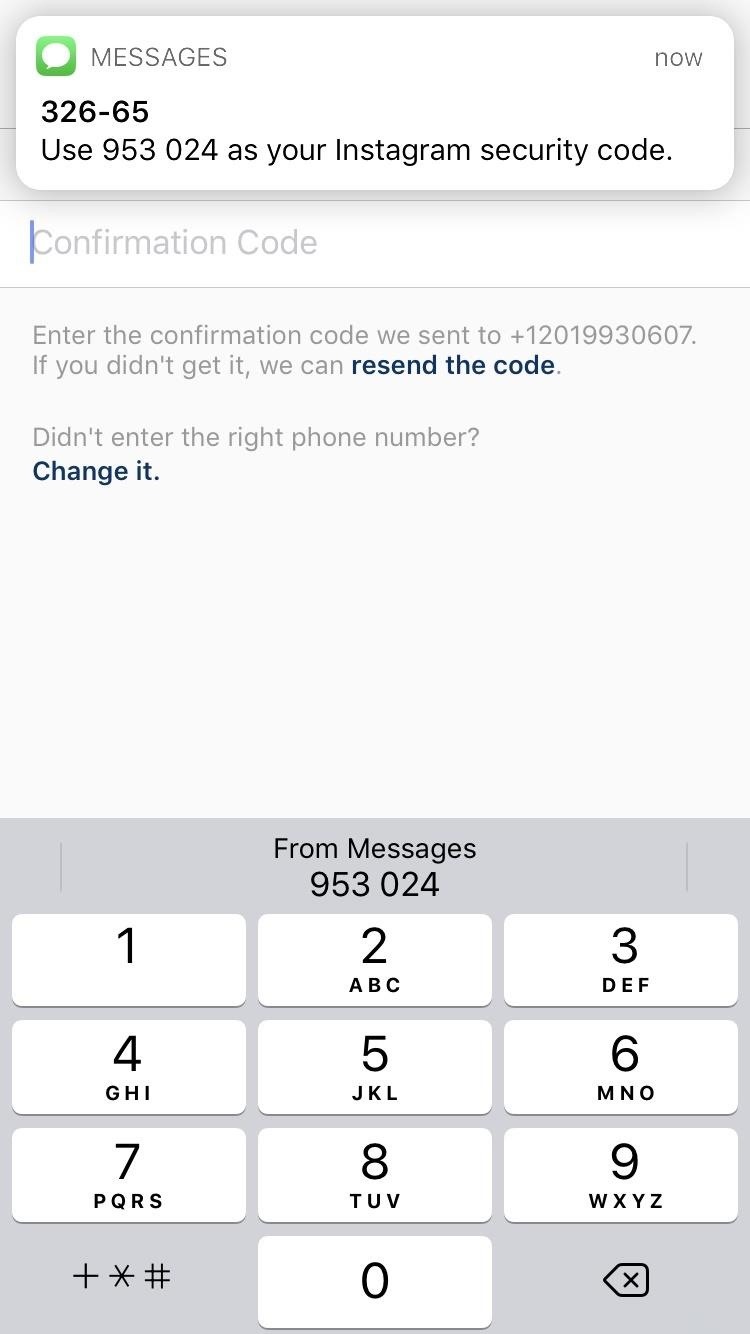
This is a security setting you should simply be aware of, considering how easy it makes 2FA. Once your iPhone gets updated to iOS 12, it would be a good idea to go through any online accounts that contain sensitive data and enable 2FA if it’s available.
2. Audit Your Passwords
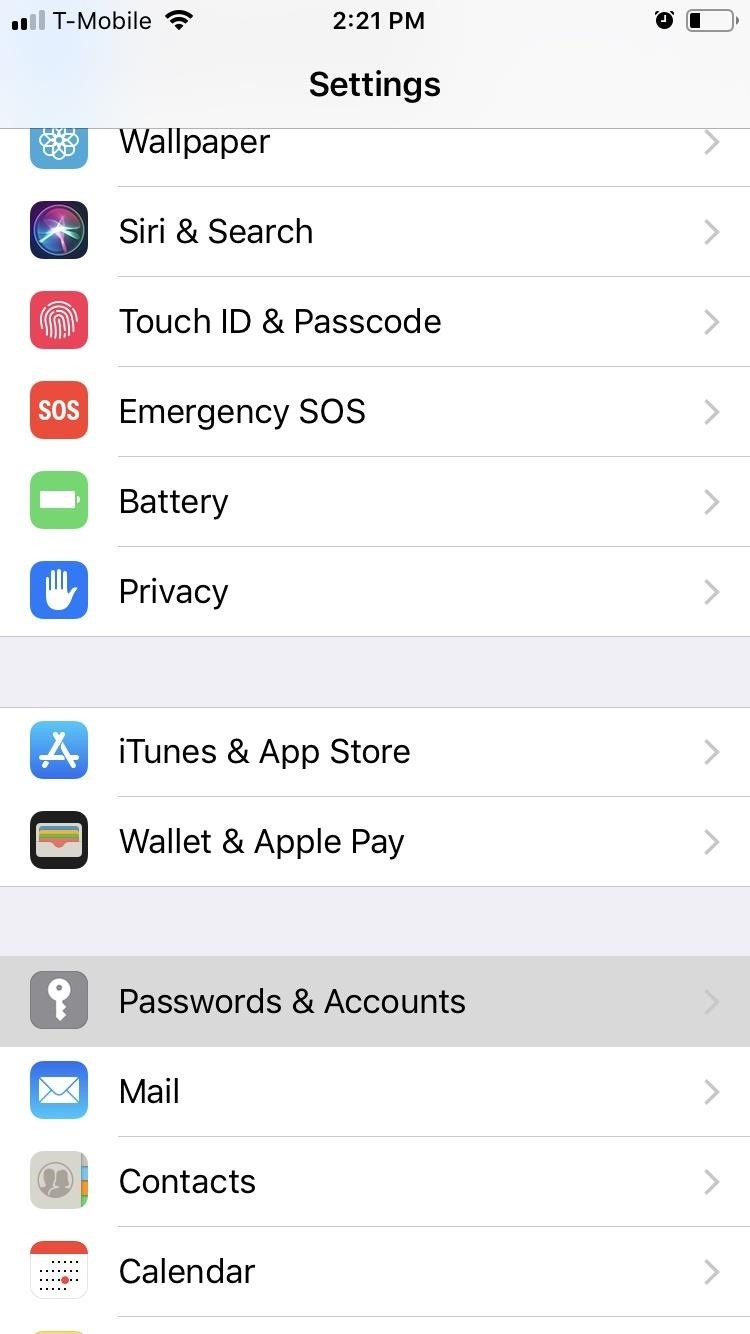
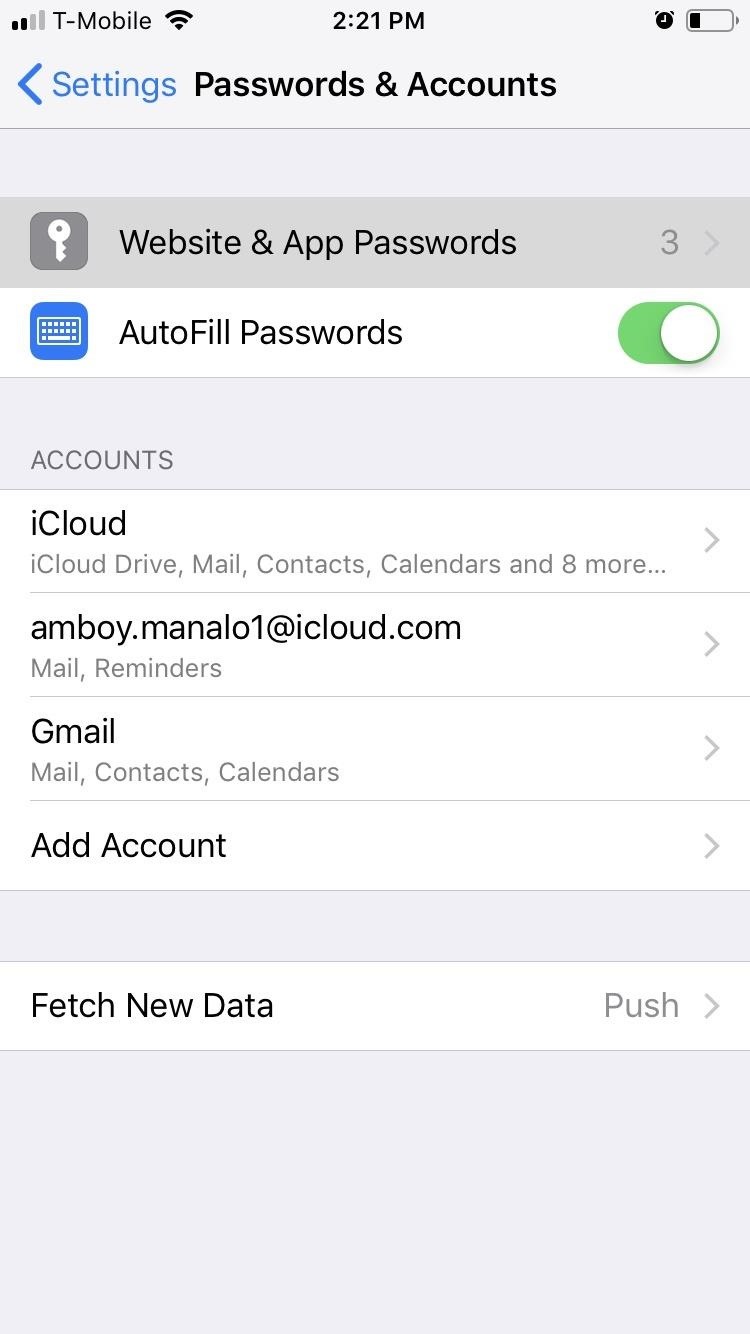
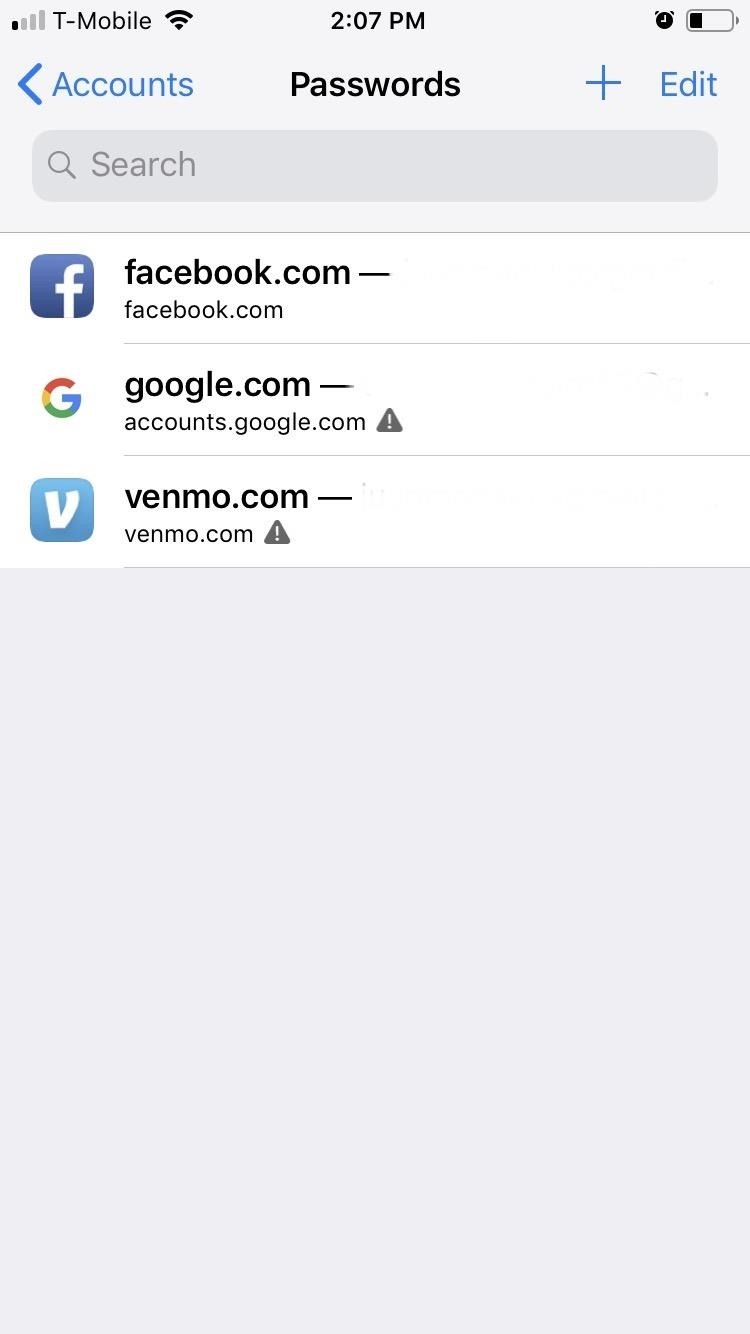
To further beef up your privacy and security, iOS 12 has introduced Password Reuse Auditing, a feature that keeps track of saved passwords and flags identical ones for different accounts; This can be accessed by going to Settings –> Password & Accounts –> Website & App Passwords. From there, any accounts that have identical passwords will be marked with a triangle containing an exclamation point.
Tap on any of the suspect accounts, and select „Change Password on Website“ on the following page to create a new password.
3. Keep USB Restricted Mode On
Brute-force USB unlocking tools like Cellebrite and GrayShift have become popular in law enforcement circles nationwide due to their ability to bypass iOS restrictions on the number of incorrect passcode attempts. This enables officers to unlock confiscated devices by entering an unlimited amount of guesses until they finally get past the lock screen.
In an effort to combat this, iOS 12 has USB Restricted Mode, which requires you to unlock your iPhone with a password when connecting to a USB device. Unlike past iOS betas which only required a password for devices that haven’t been unlocked for seven days, iOS 12 (as well as iOS 11.4.1 before it) has significantly reduced the requirement window to one hour.
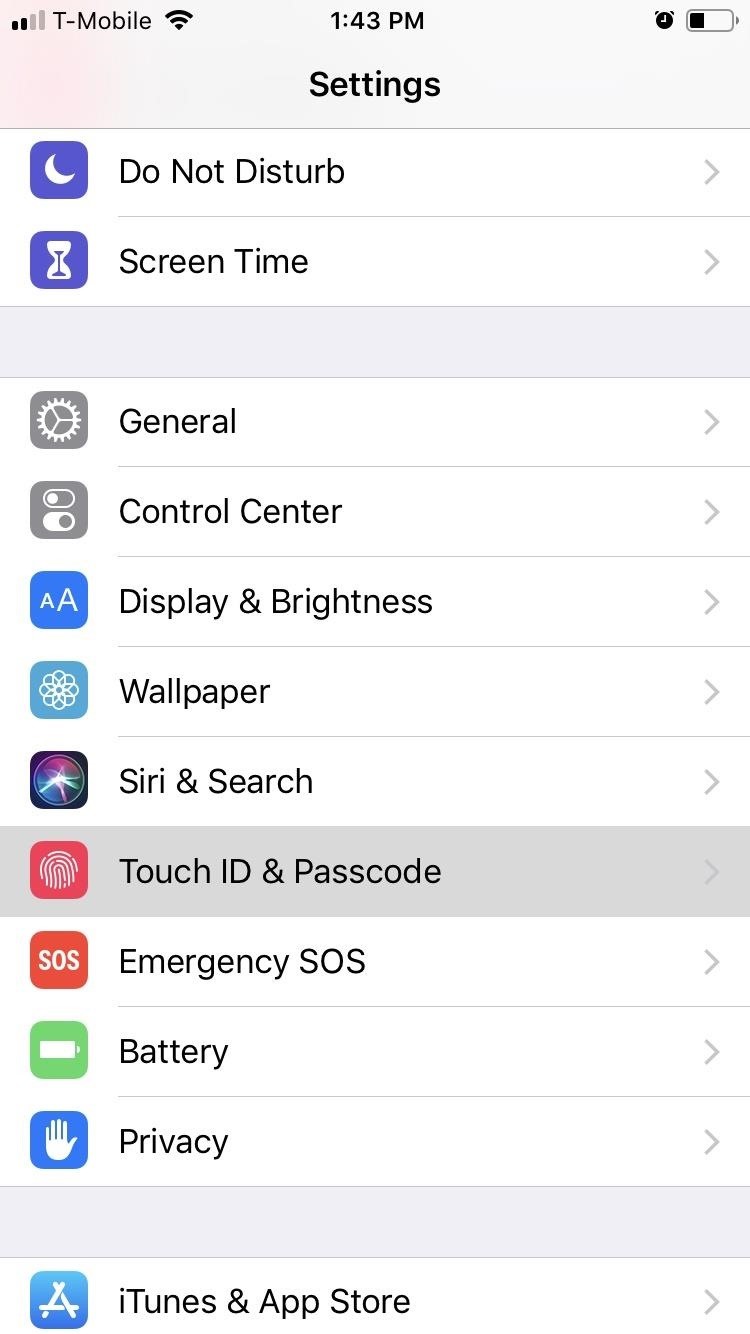
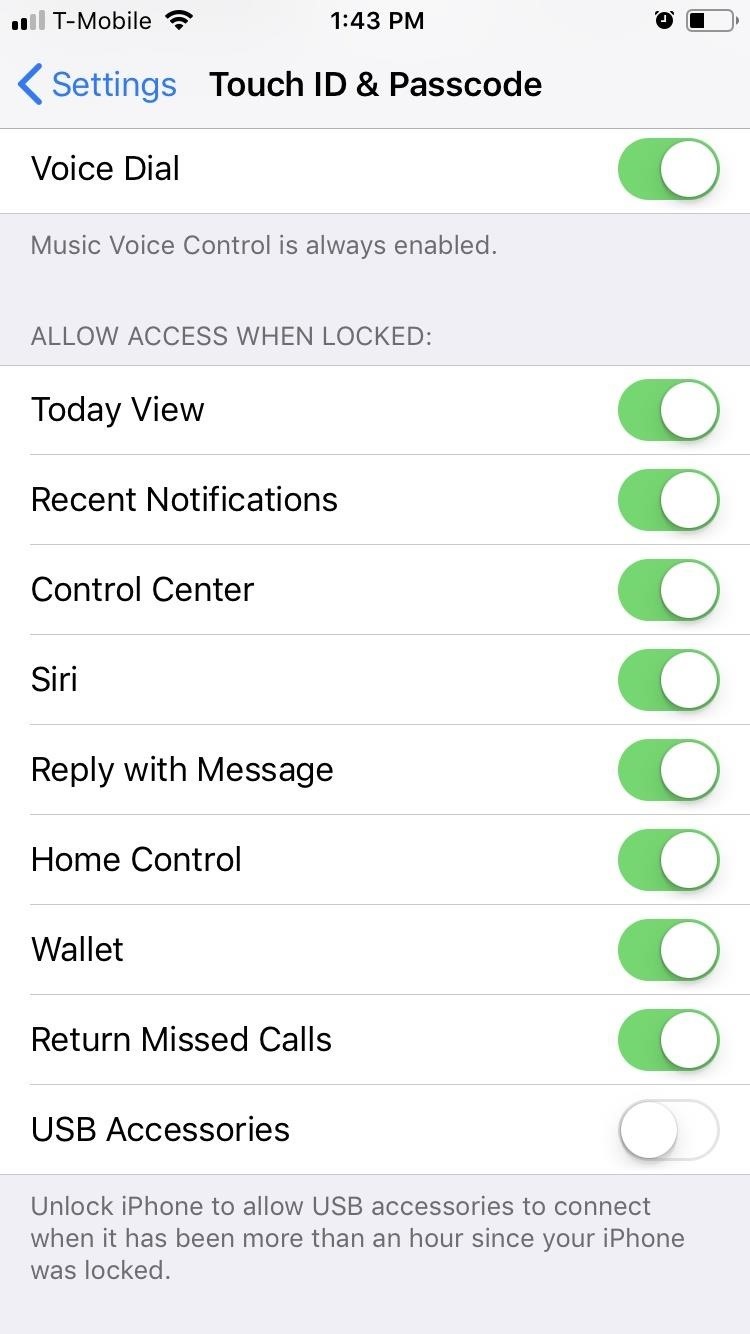
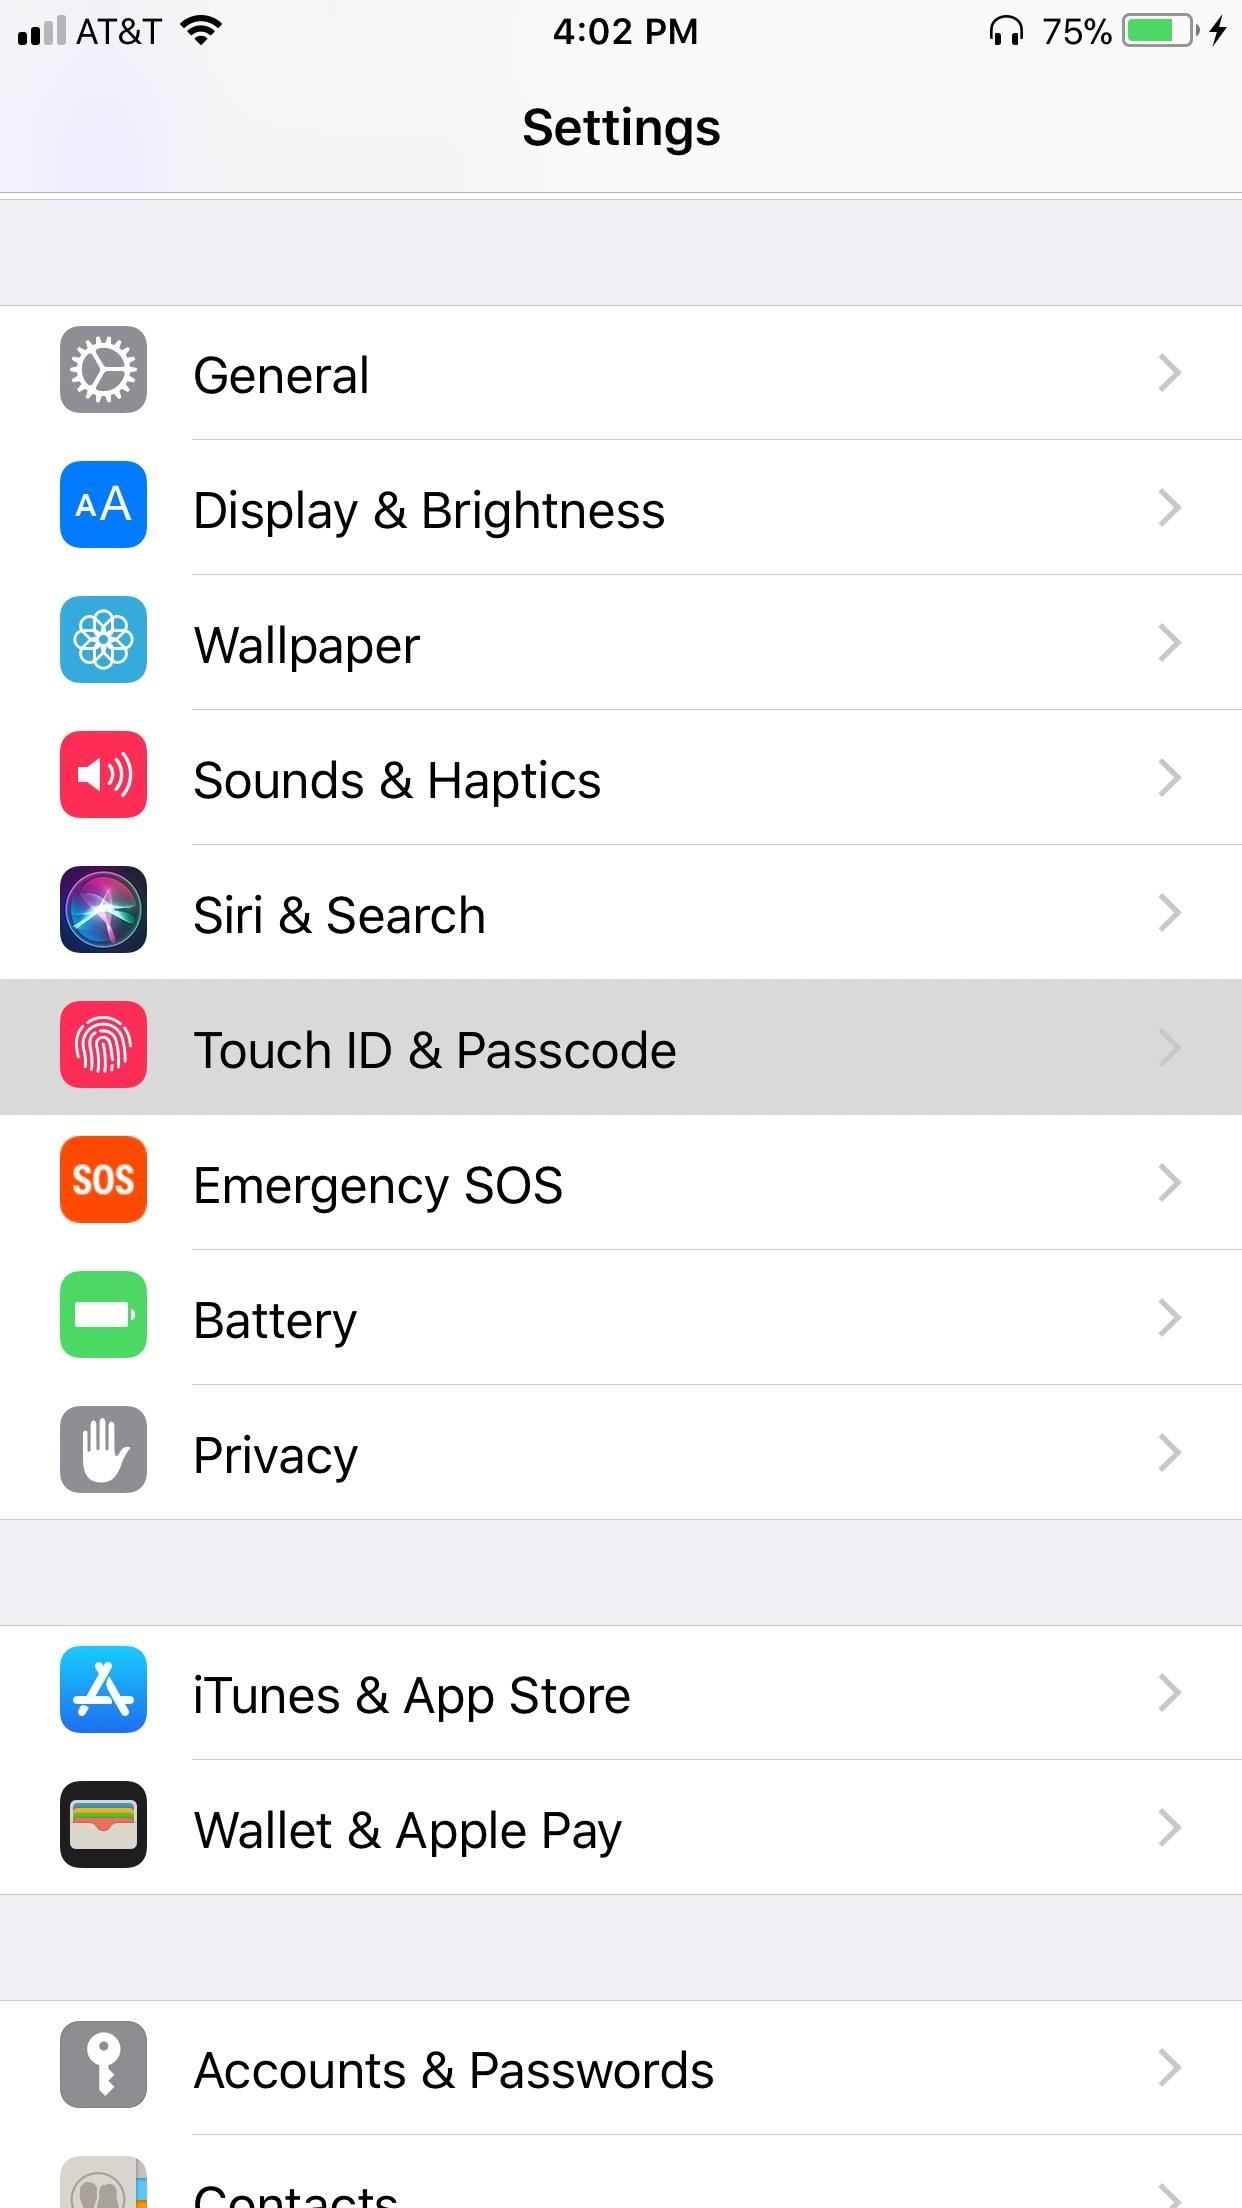
This stringent requirement effectively nullifies law enforcement’s ability to unlock suspect iPhones with USB unlocking tools, as they will have only a 60-minute window to gain access to the device before the password requirement kicks in. If you want to disable this feature, however, head to Settings –> Touch ID & Passcode, and tap on the toggle next to „USB Accessories“ so it’s green.
4. Disable Face ID (iPhone X)
With its first anniversary fast approaching, it’s safe to say that Face ID has proved to be a reliable way of unlocking your iPhone X while keeping it secure from unwanted access. Nothing is bulletproof, however. Apple advertises a false acceptance rate of 1 in a million for Face ID, and considering there are 7.6 billion people on earth, that means roughly 7,600 other people could unlock your iPhone.
If that’s not enough to warrant concern, there’s an even higher chance of someone forcibly using your own face against your will to gain access to your iPhone. So if you want to maximize security, we recommend disabling Face ID altogether by going to Settings –> Face ID & Passcode. Instead, use a strong password, something longer than a six-digit numeric passcode.
5. Disable Face ID Temporarily (iPhone X Only)
If you must keep Face ID on, don’t worry. Apple has included a quick way to disable Face ID temporarily, in case you know your physical security is about to become compromised. Be sure to check out our guide below to find out more about this option, which leaves your phone’s security in the hands of your passcode.
6. Disable Touch ID
Just like the iPhone X with Face ID, Touch ID on other iPhone models can be a problem. For one, you don’t want to store your fingerprint in any database, even if it’s locally on your iPhone, since someone could potentially pull that record with access to your device. It’s much safer in the long run to use a less-convenient passcode. You can disable Touch ID via the Touch ID & Passcode settings.
7. Disable Touch ID Temporarily
Again, just like with Face ID, you can disable Touch ID temporarily instead if you don’t want to lose the convenience of Touch ID permanently. With a certain button combo press, you can disable it before handing it over to law enforcement, thieves, or even nosy friends and family.
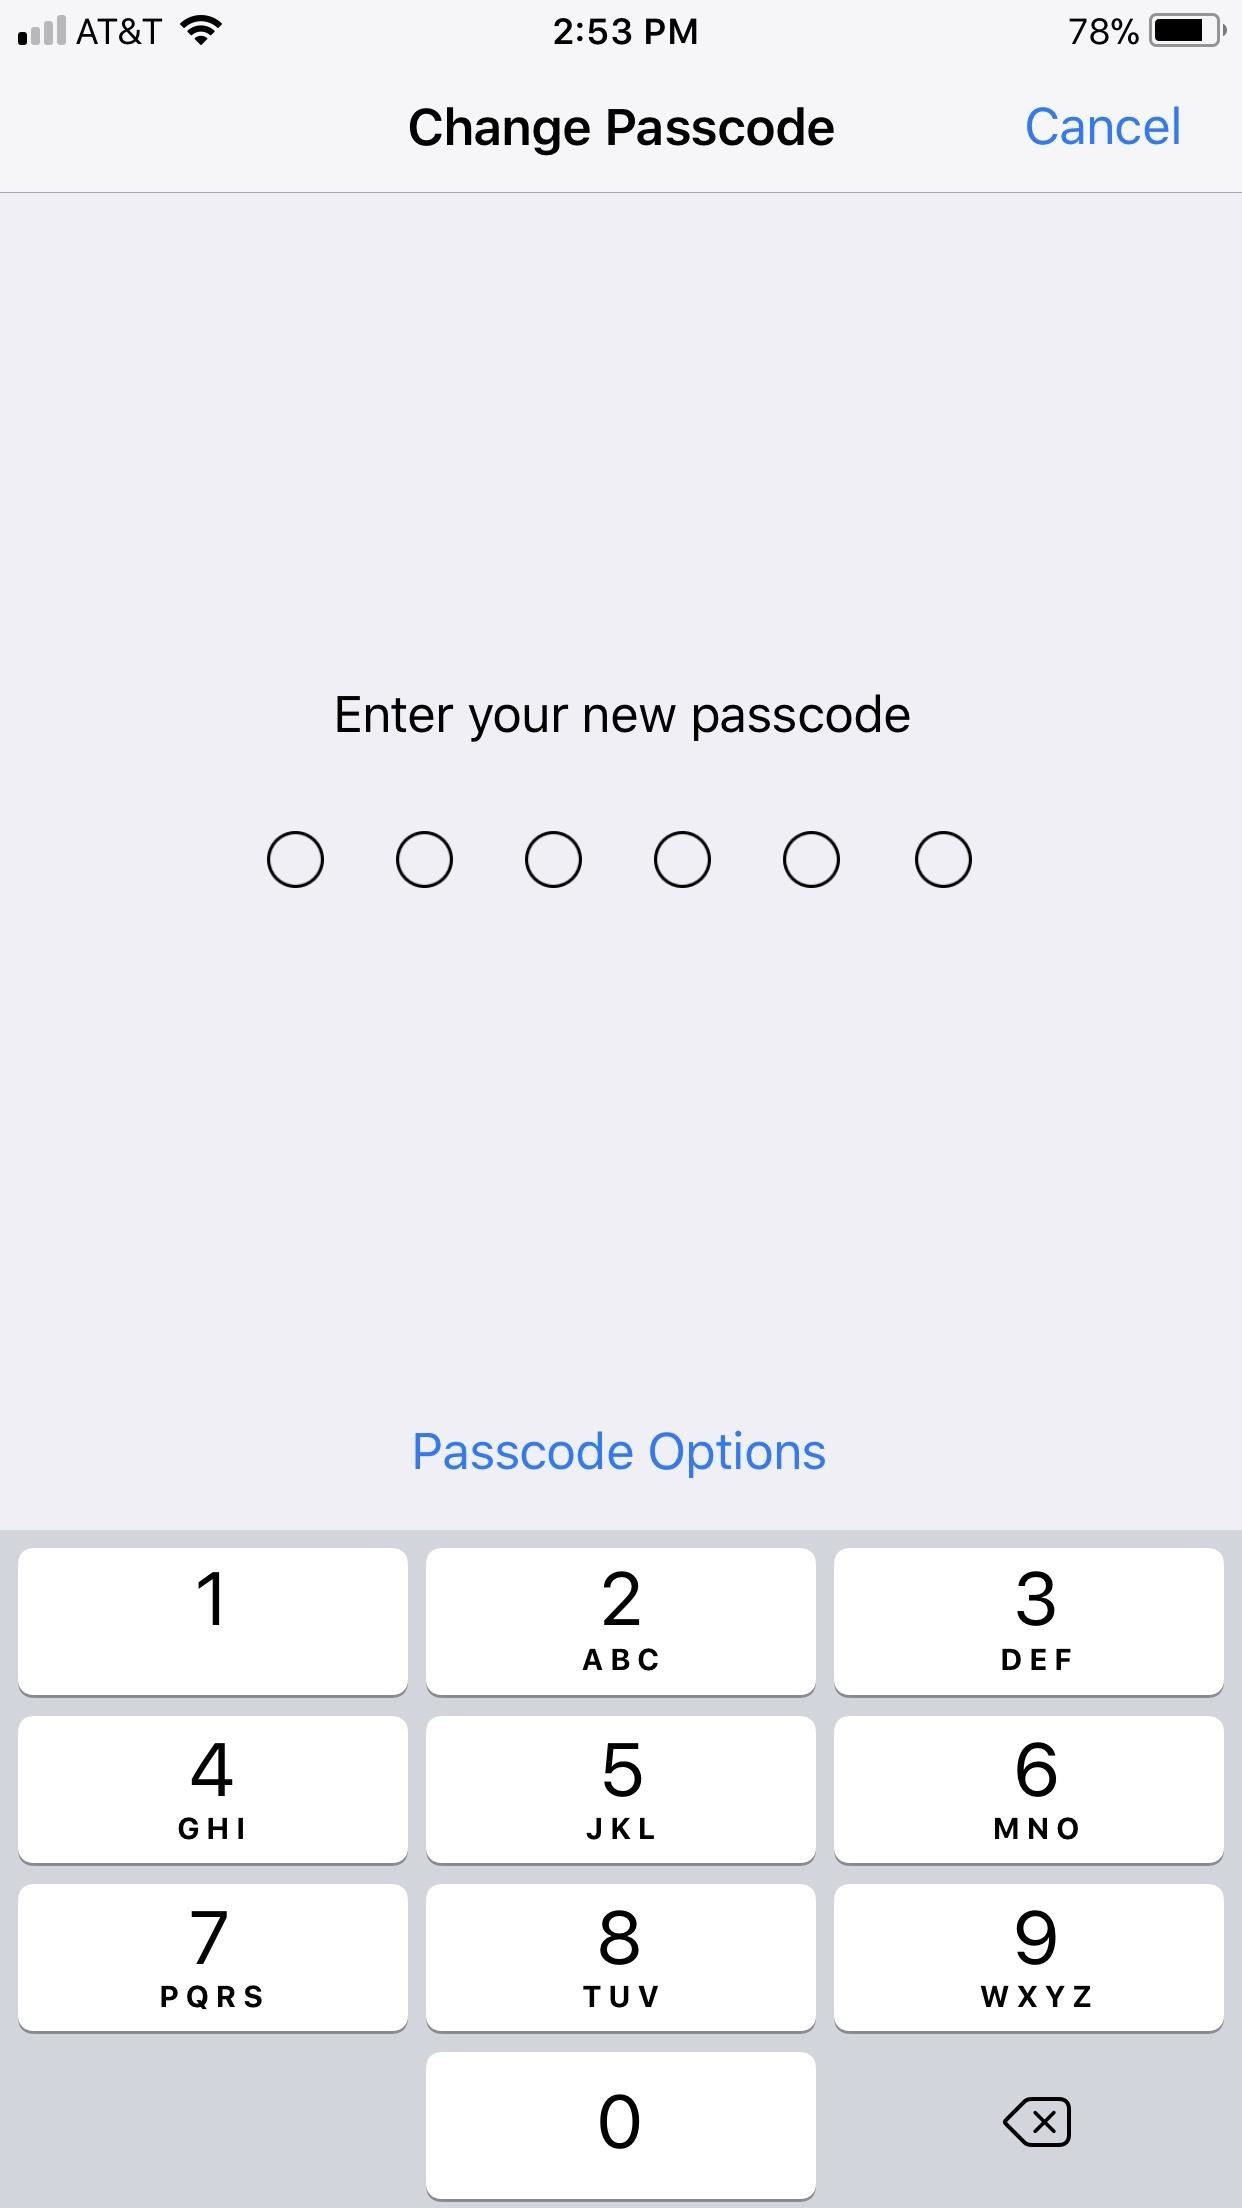
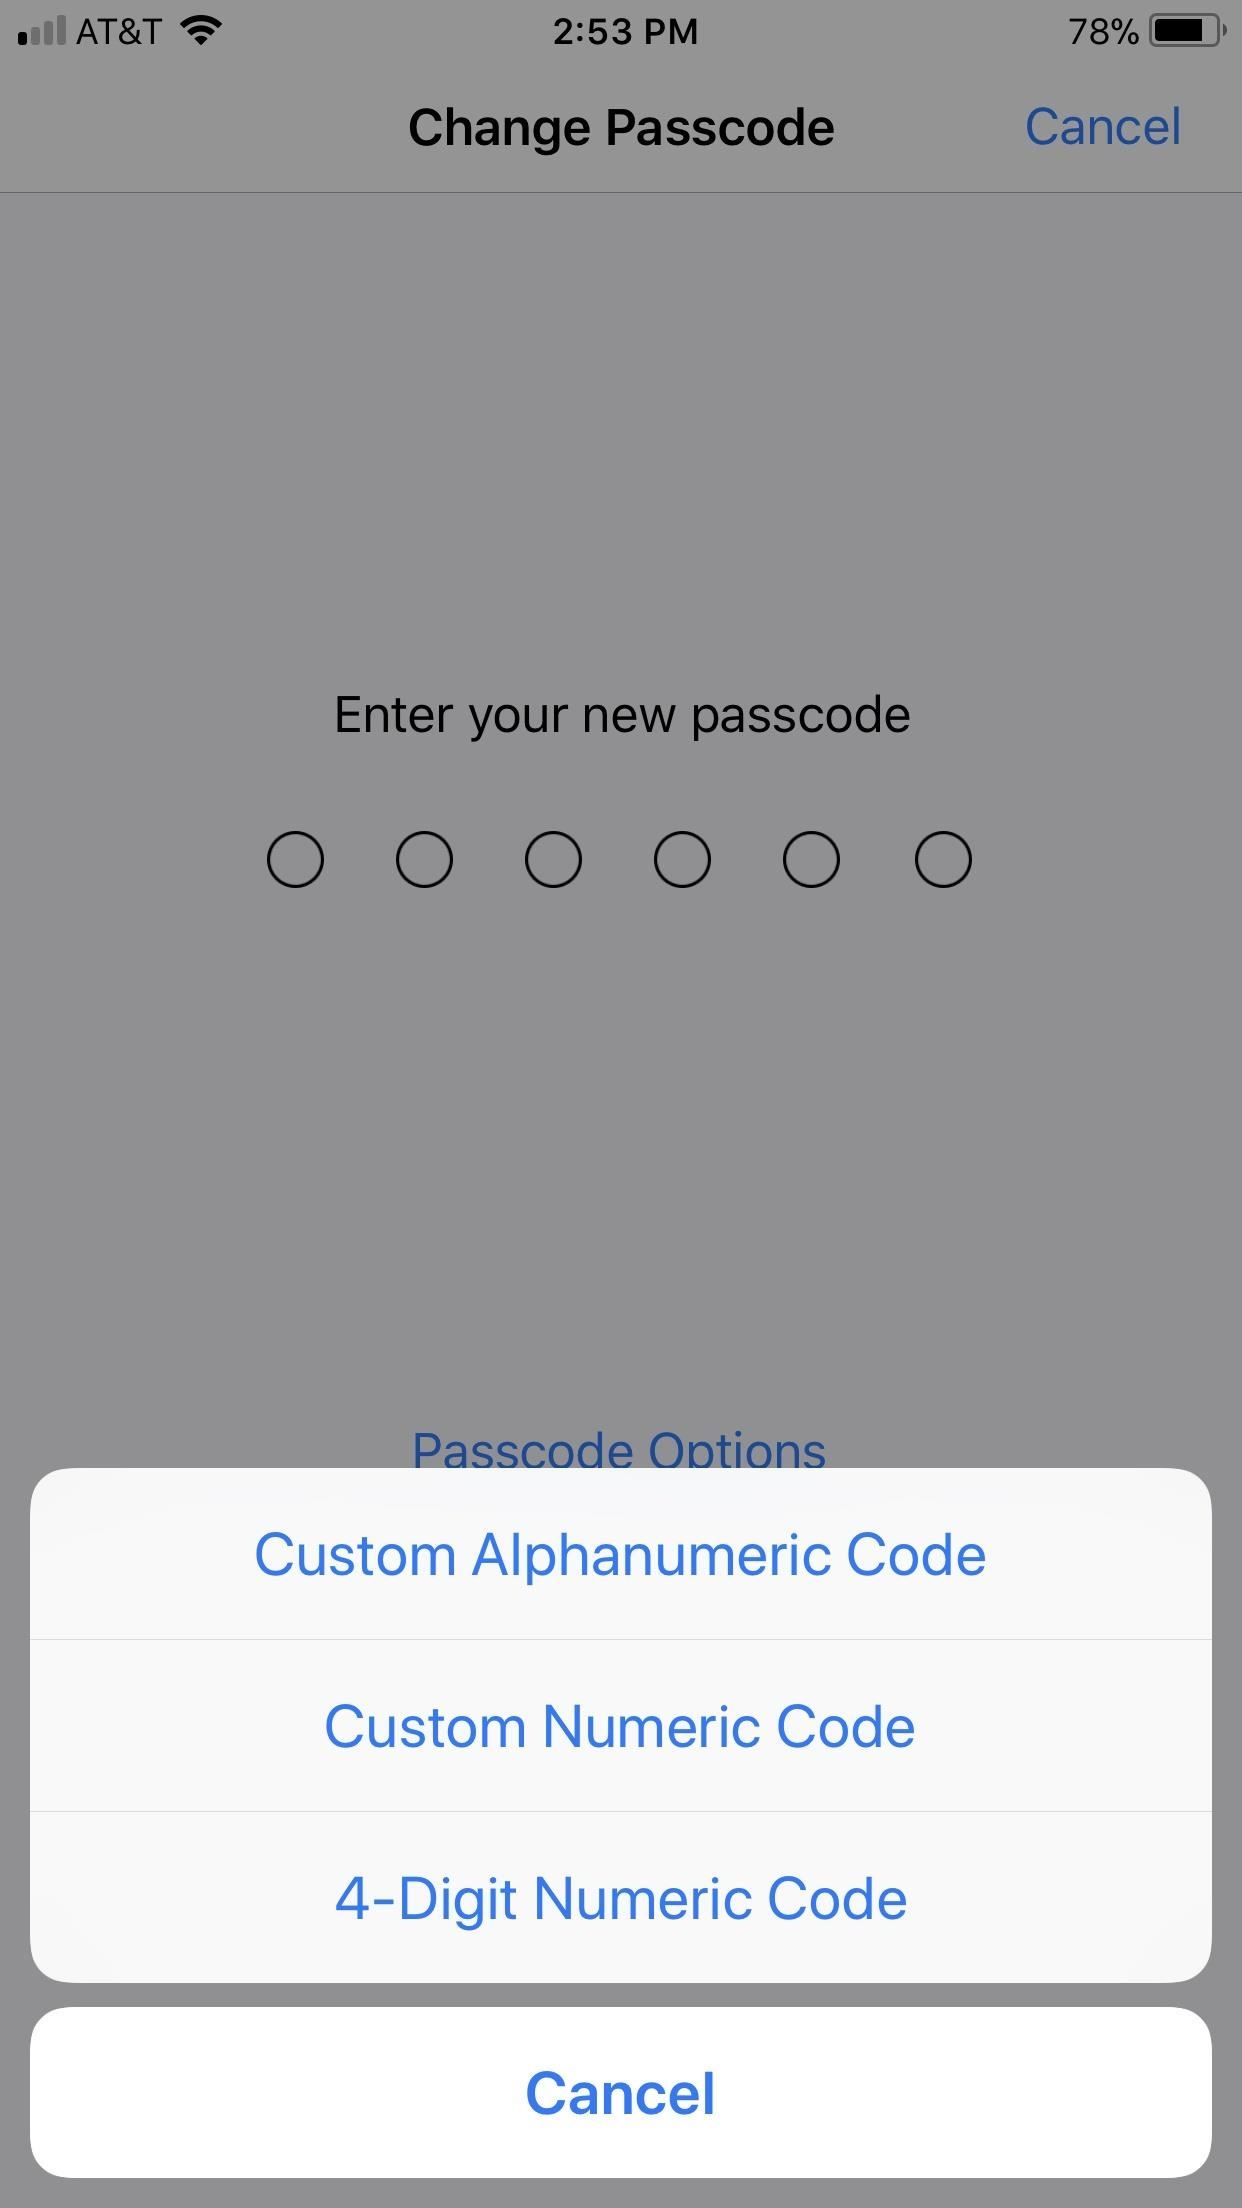
8. Set a Stronger Passcode
By default, the iPhone passcode is six numeric digits long, though you can still set it to four numeric digits for added convenience. While there is nothing inherently wrong with using these passcode limits, they aren’t the most secure. A four-digit passcode, for instance, has 10,000 possible combinations, and considering there are 85.8 million iPhone users in the United States alone, there just aren’t enough unique combinations to go around.
Increasing the passcode to six digits increases the number of possible combinations to one million and brings it up to par with Face ID’s odds. If you want to go beyond those odds and maximize your iPhone’s security, change your passcode to a password, as using a true password with a combination of letters, numbers, and special characters will make your lock screen virtually impenetrable.
Granted, entering a convoluted password into your phone every time you want to use it is not ideal, but it’s currently the most secure way to lock your iPhone. So if you want to maintain a balance between convenience and security, choose a six-digit passcode over a four-digit one, while making sure to avoid common passcodes like 123456 or six of the same number.
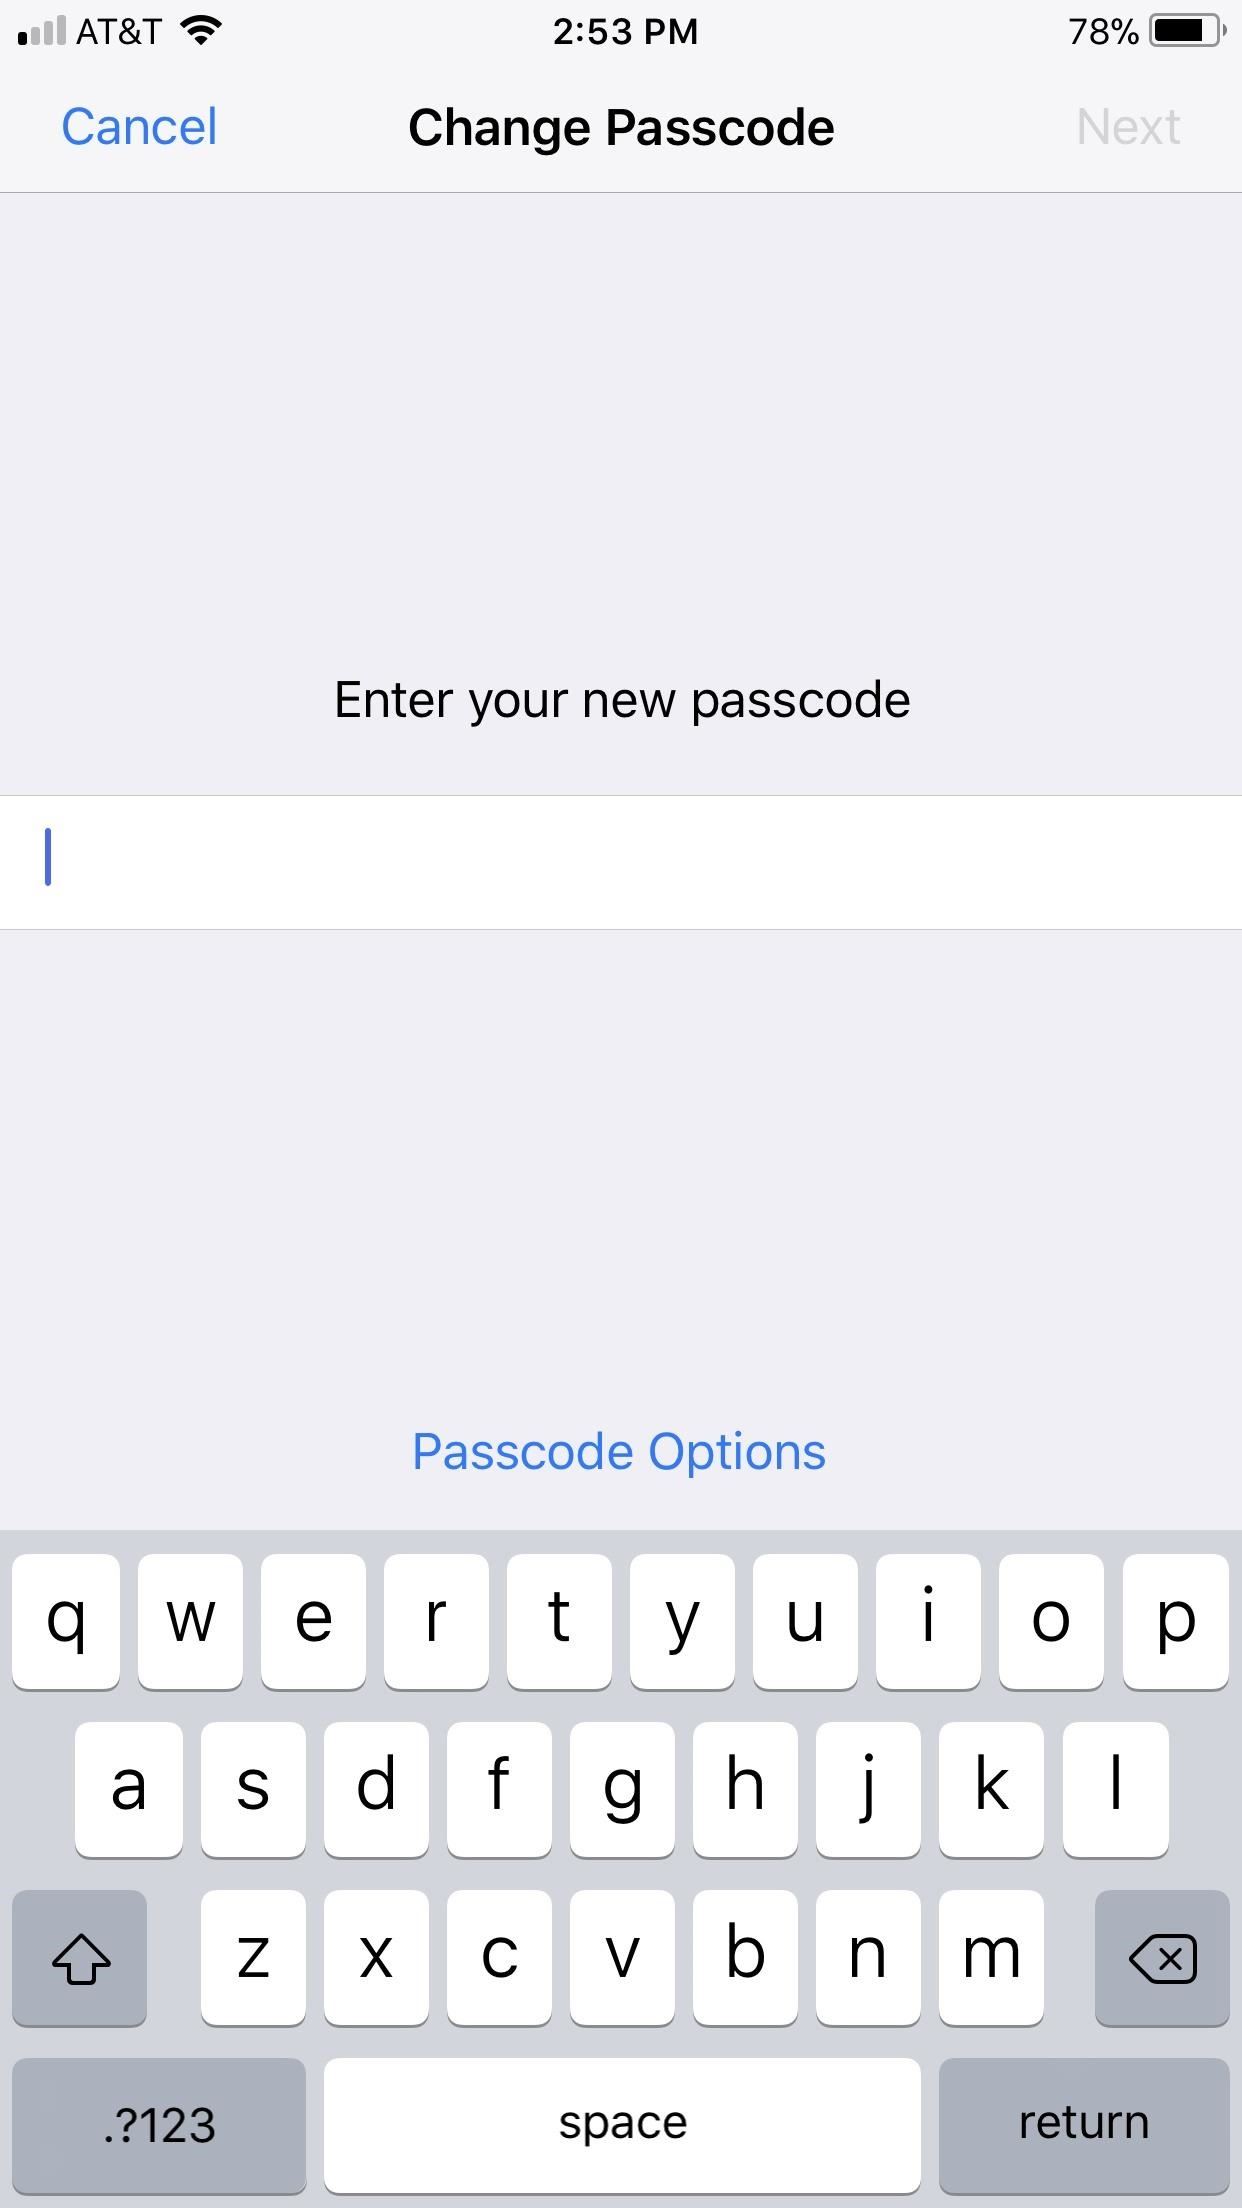
To change your iPhone’s password, go to Settings –> Touch ID & Passcode –> Change Passcode. Enter your old passcode when prompted, then tap „Passcode Options“ to choose which type of passcode you’d like to make.
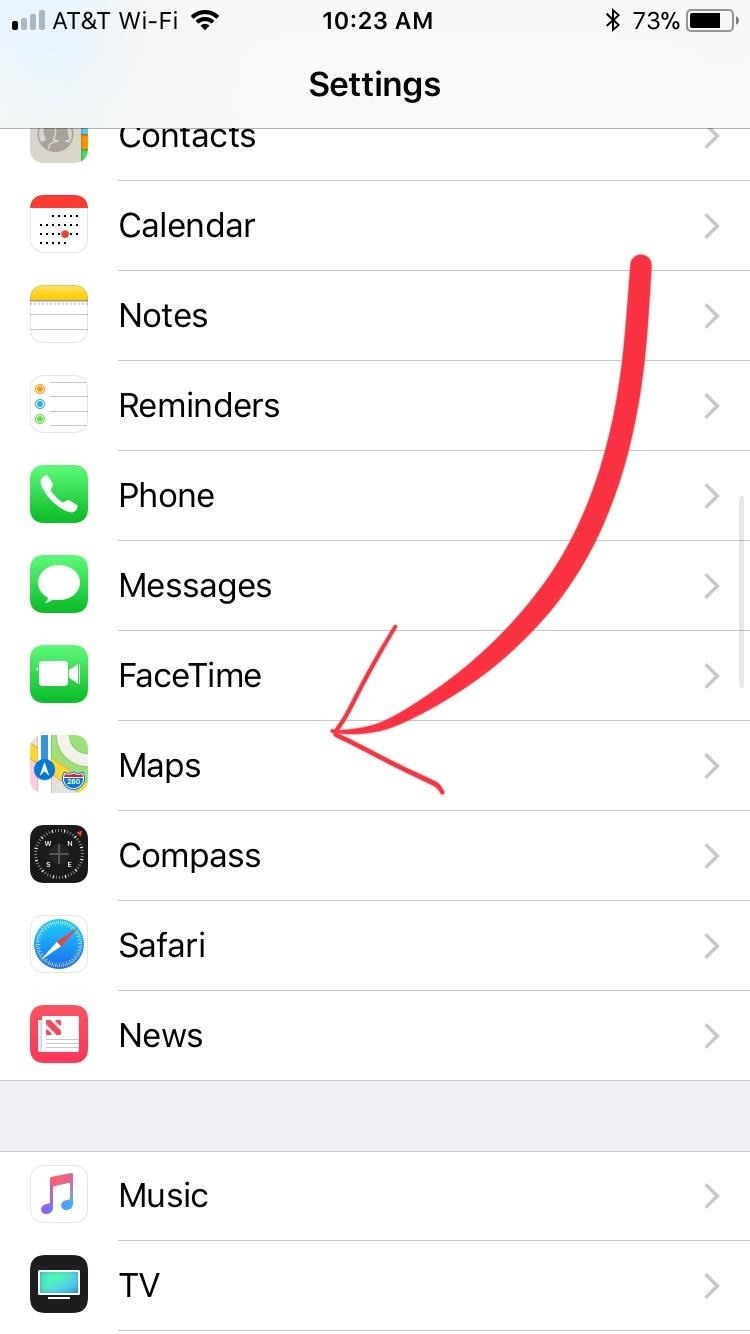
9. Stop Showing Parked Location
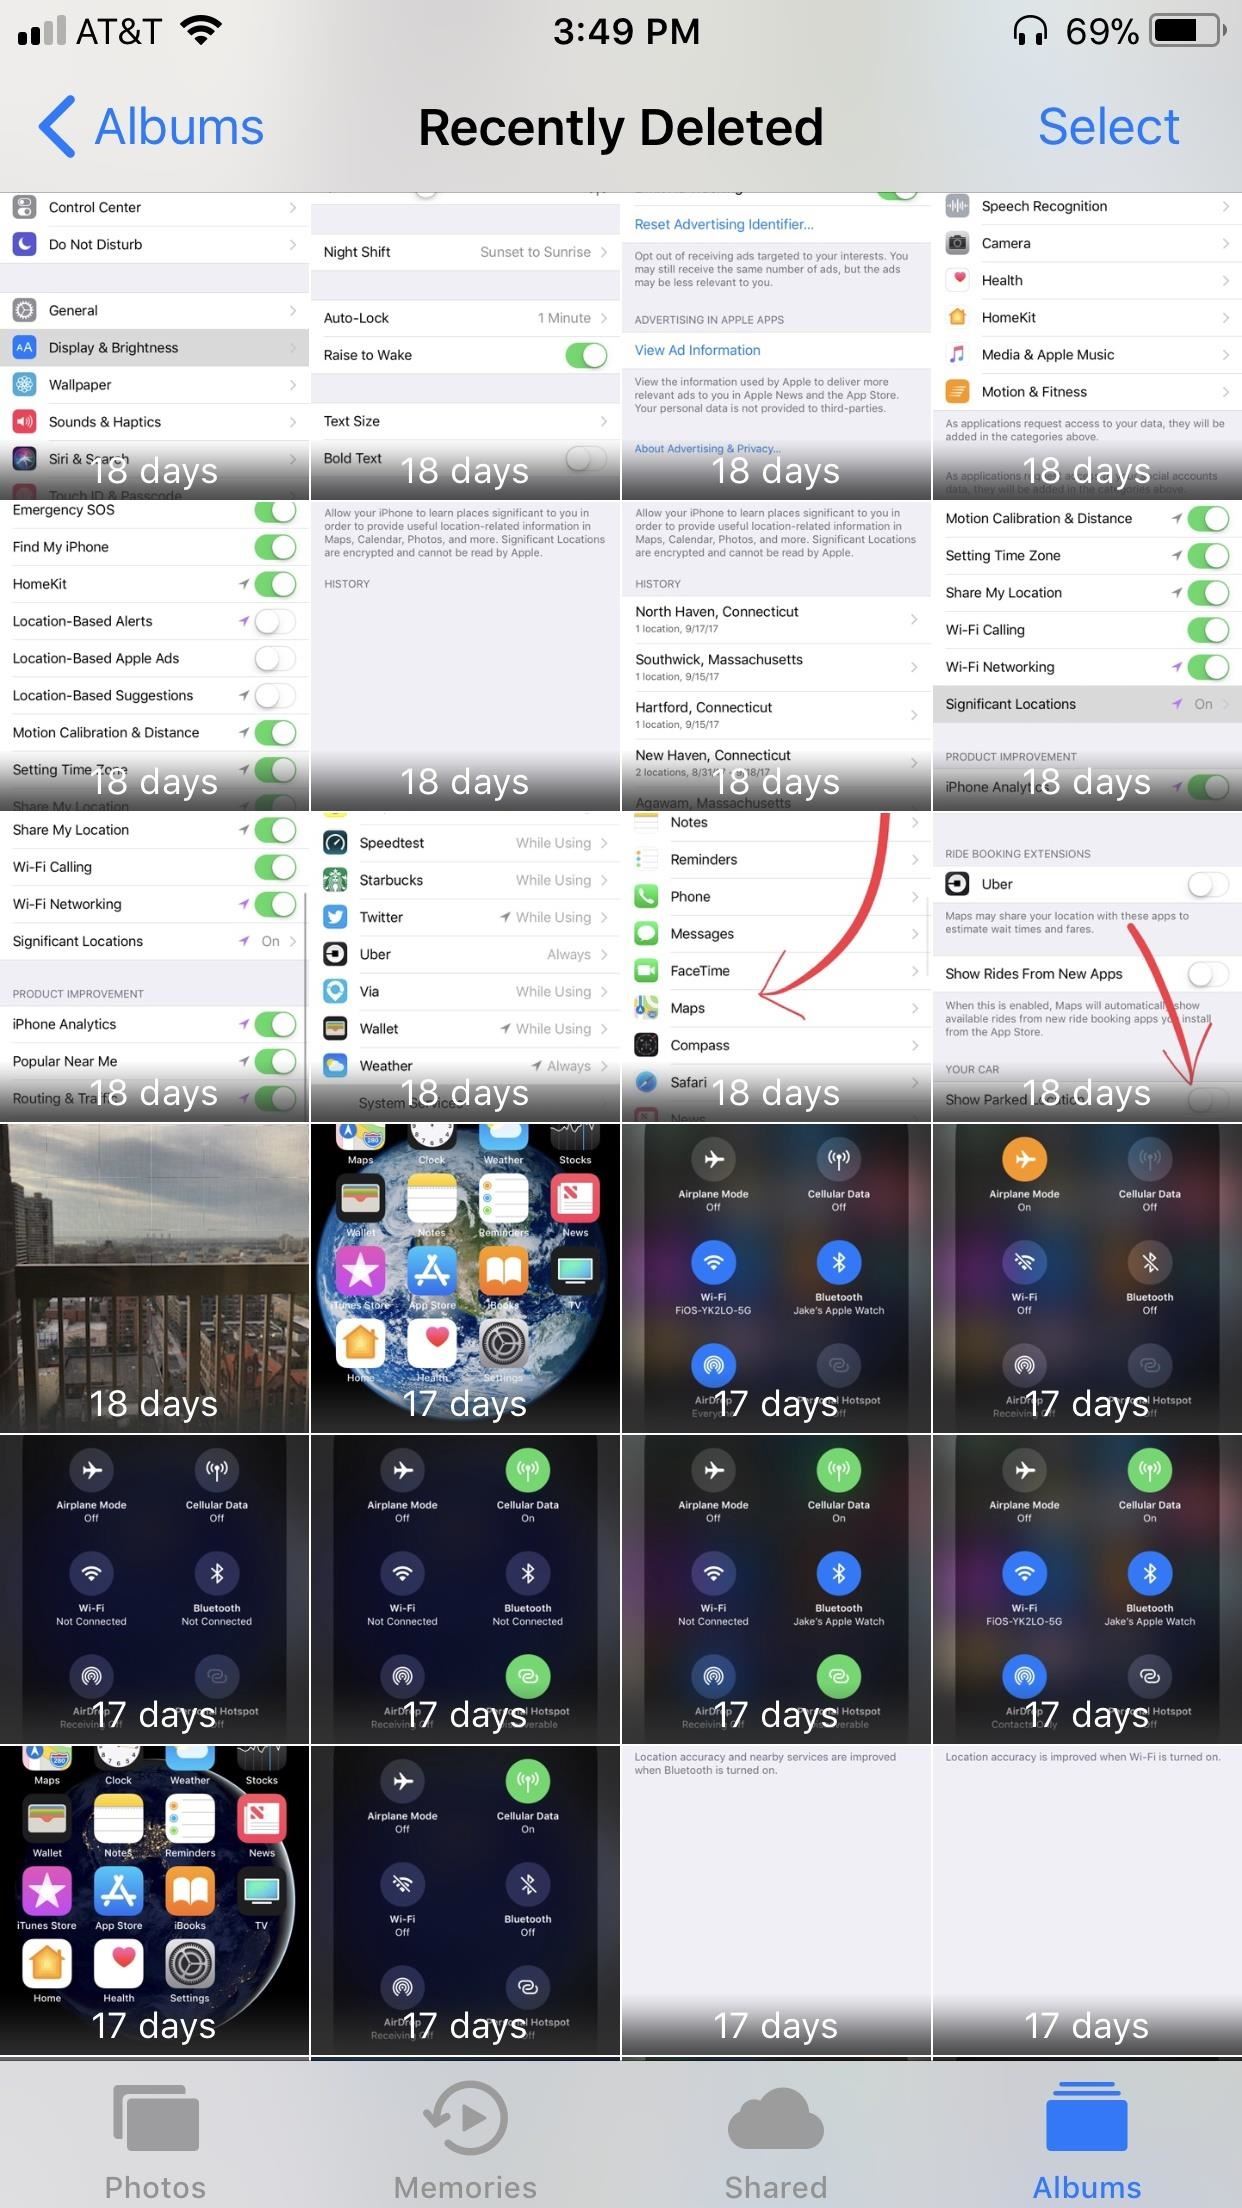
If you connect your iPhone to your car either through Bluetooth or CarPlay, your iPhone may be recording the location of where you park. While this information may be useful to some, to others, it may feel like an outright invasion of privacy. So if you feel like the latter, you’ll naturally want to shut this feature off. To do so, open your Settings app, then tap on „Maps.“ From there, simply tap on the toggle next to „Show Parked Locations“ to turn the feature off.

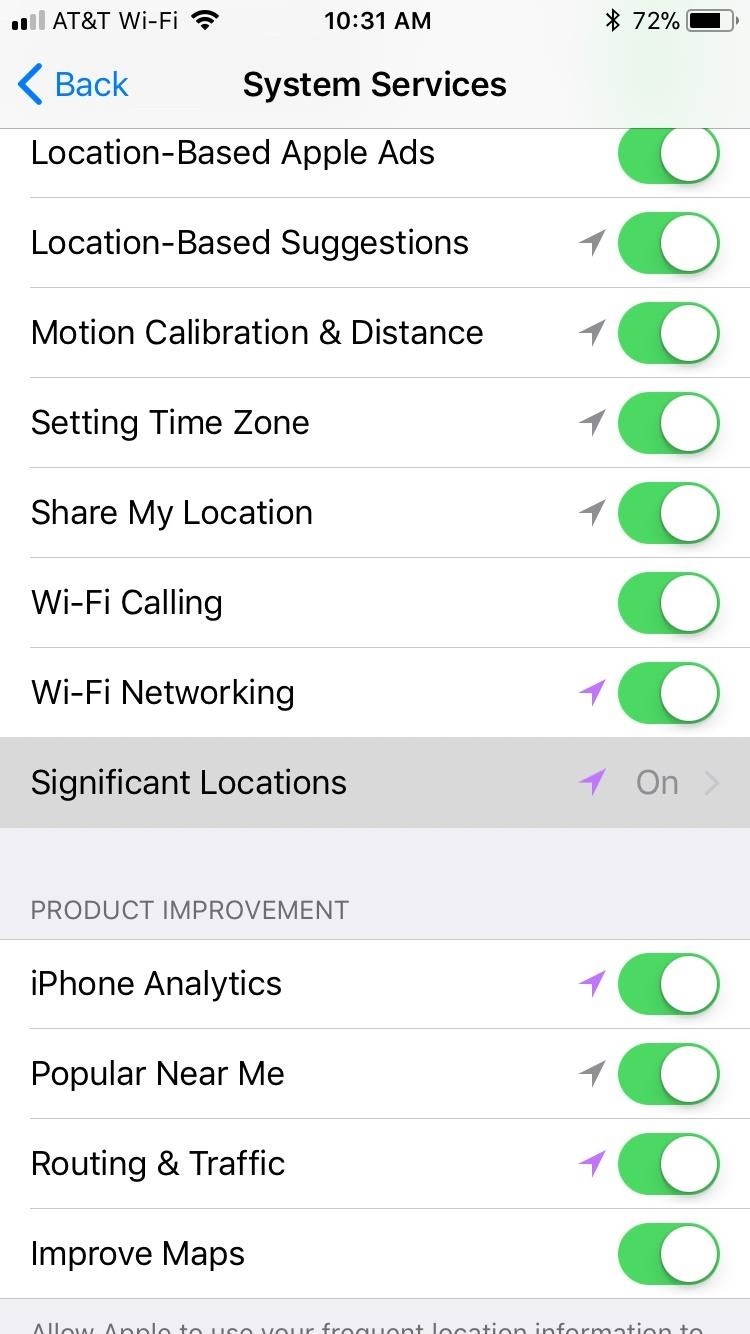
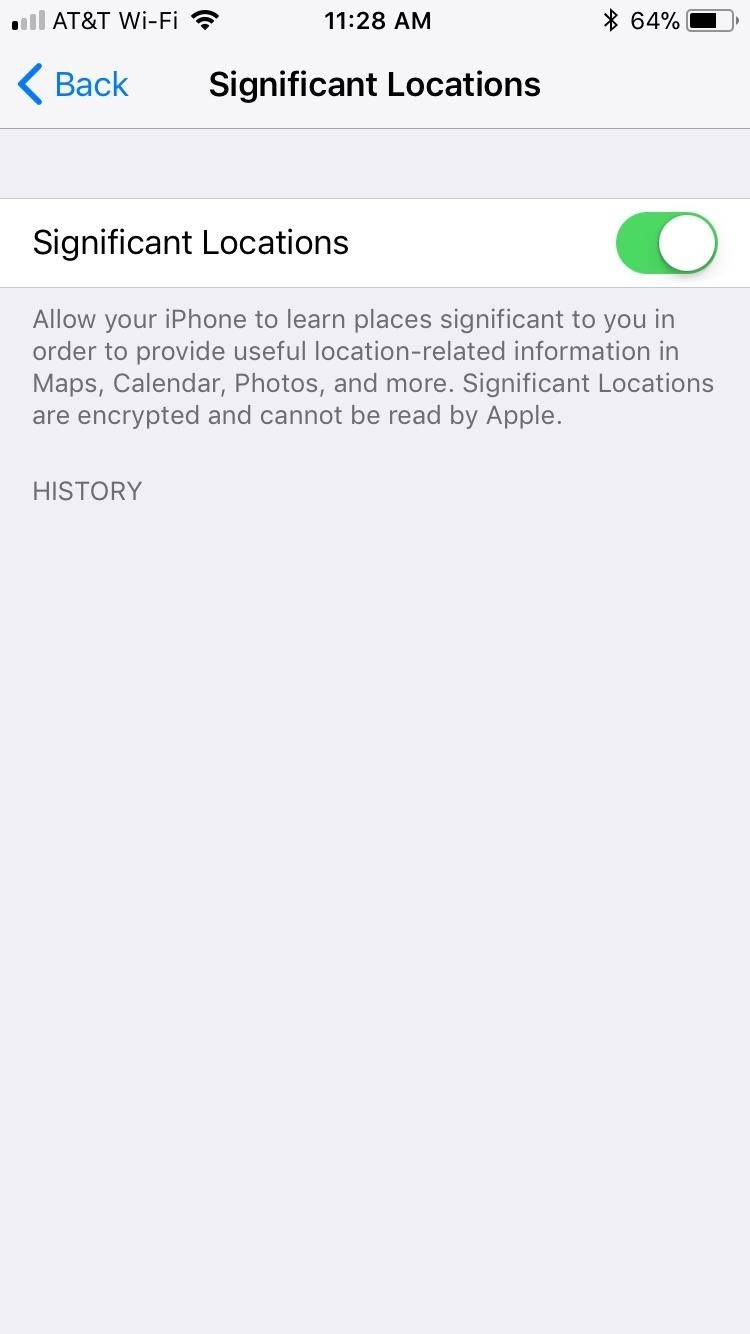
10. Disable & Clear Significant Locations
„Significant Locations“ is a setting that lets Apple record a list of your most frequently visited locations. And while this may optimize some apps that rely on location services, the improvements might be outweighed by privacy concerns overall.
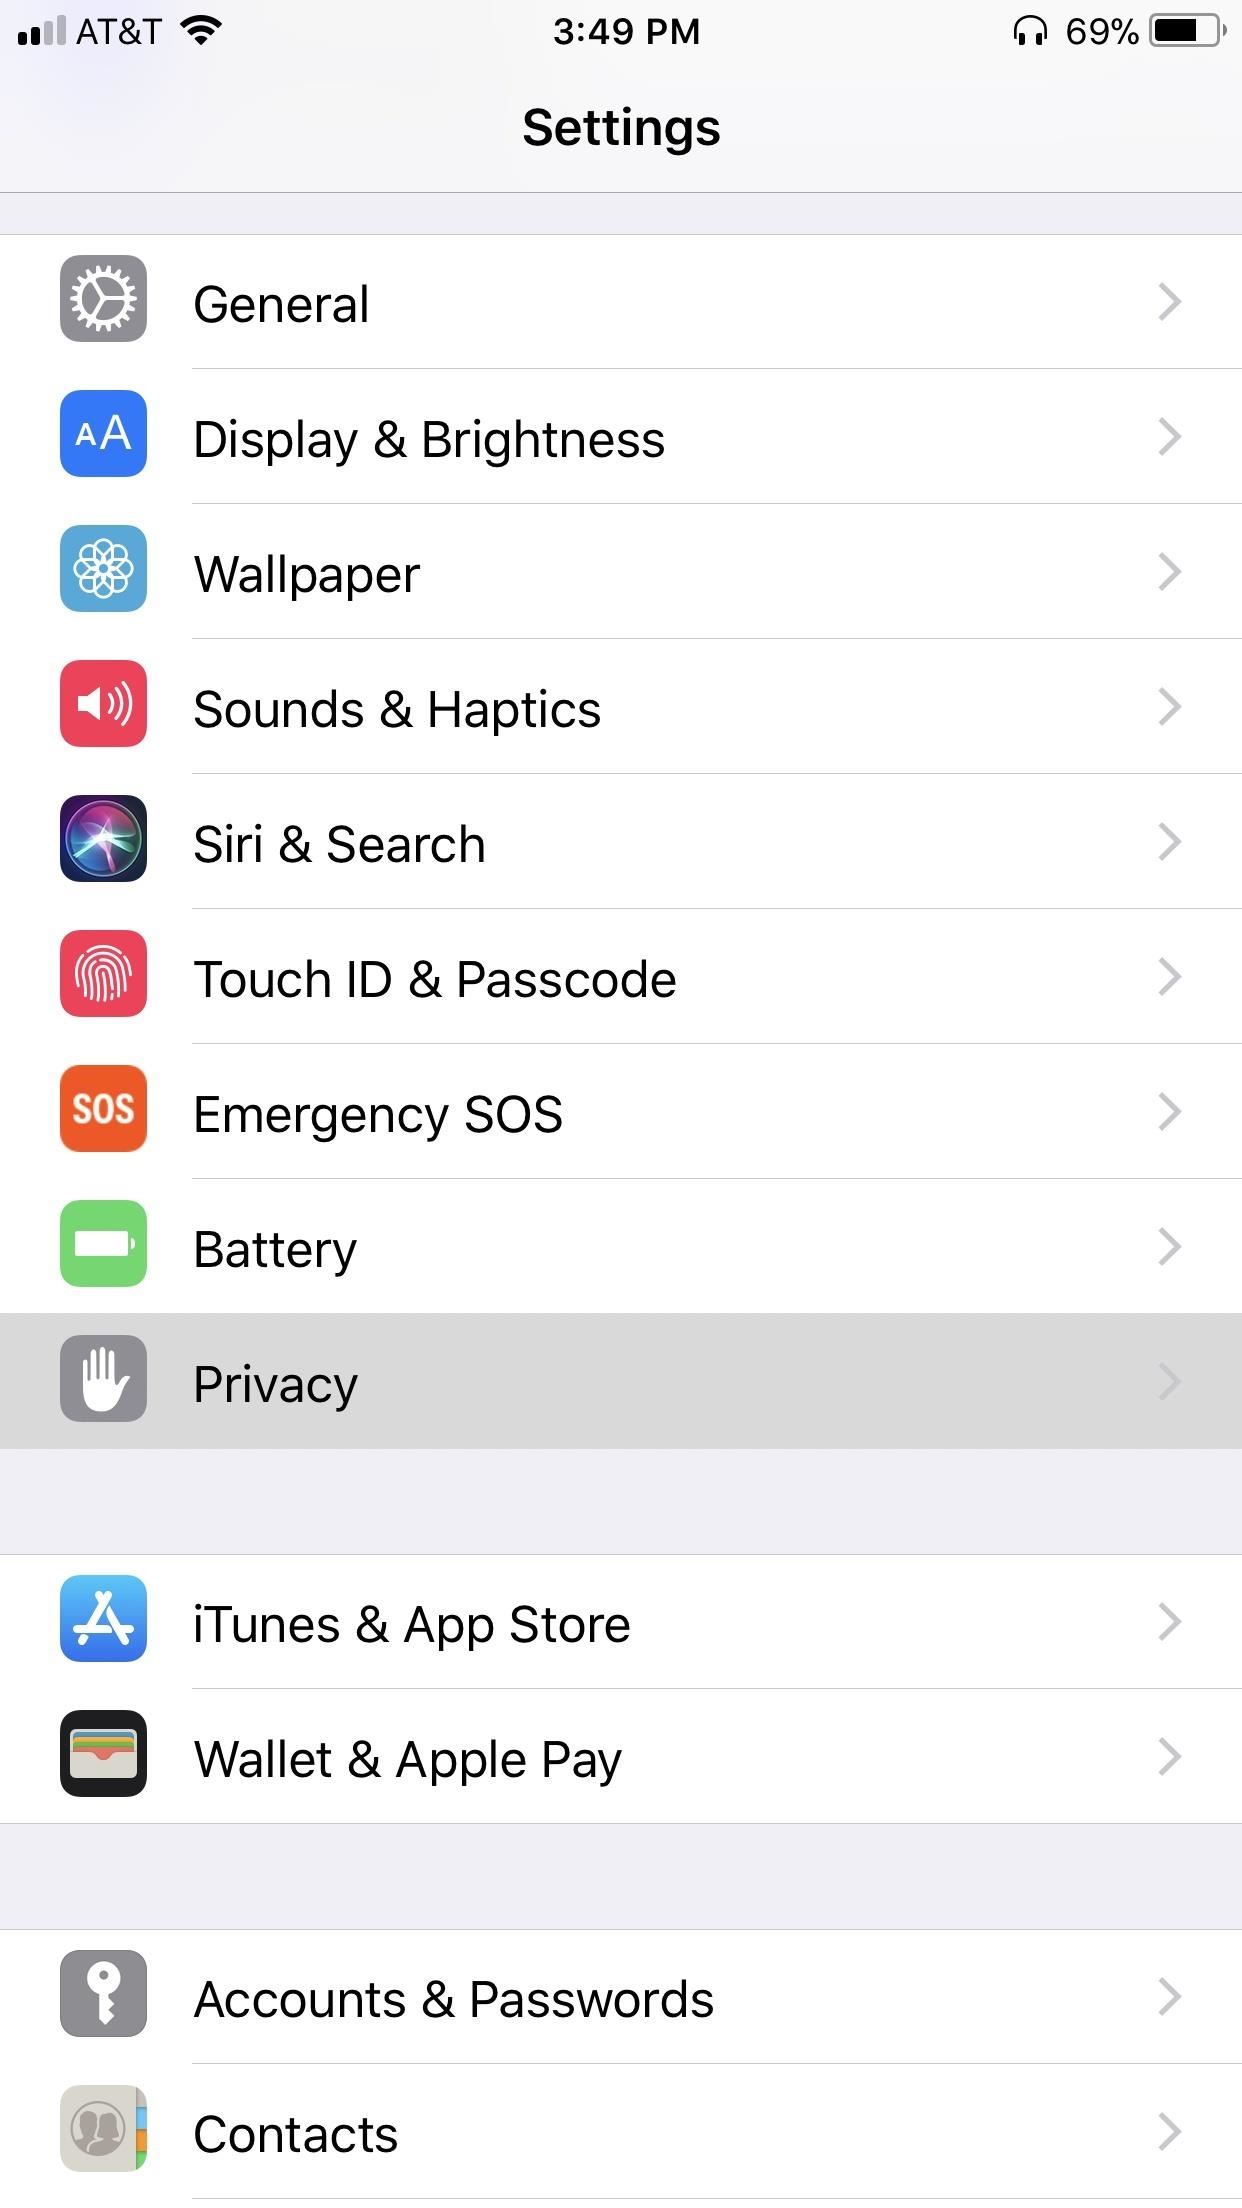
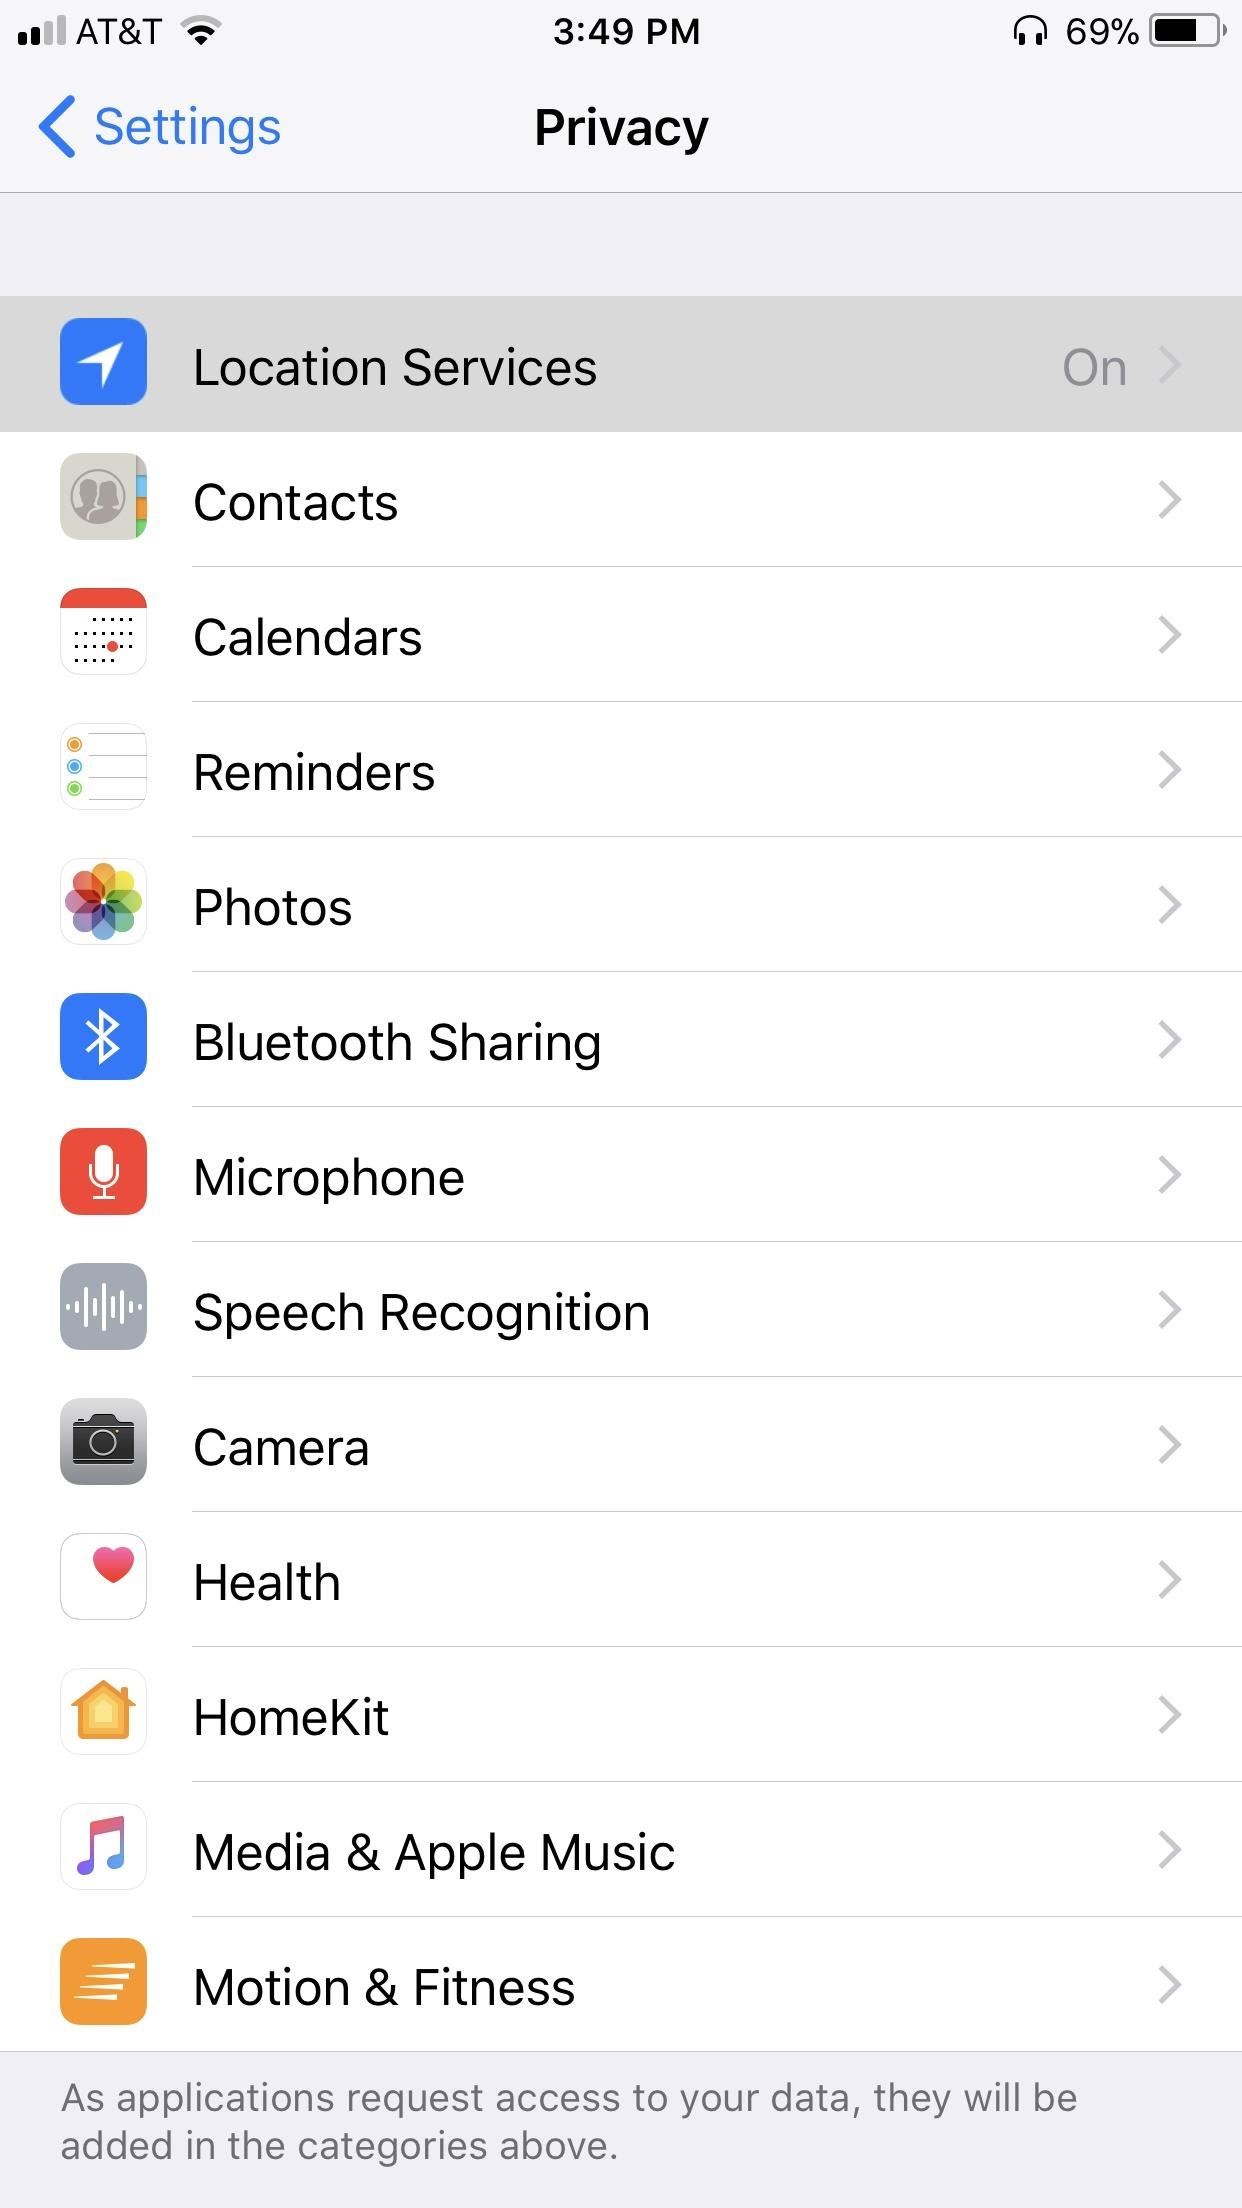
So if you’d rather not let Apple know about locations you frequently visit, head over to Settings –> Privacy –> Location Services –> System Services –> Significant Locations, then disable it. From there, you also have the added option of clearing the history that your iPhone may have accumulated over time.

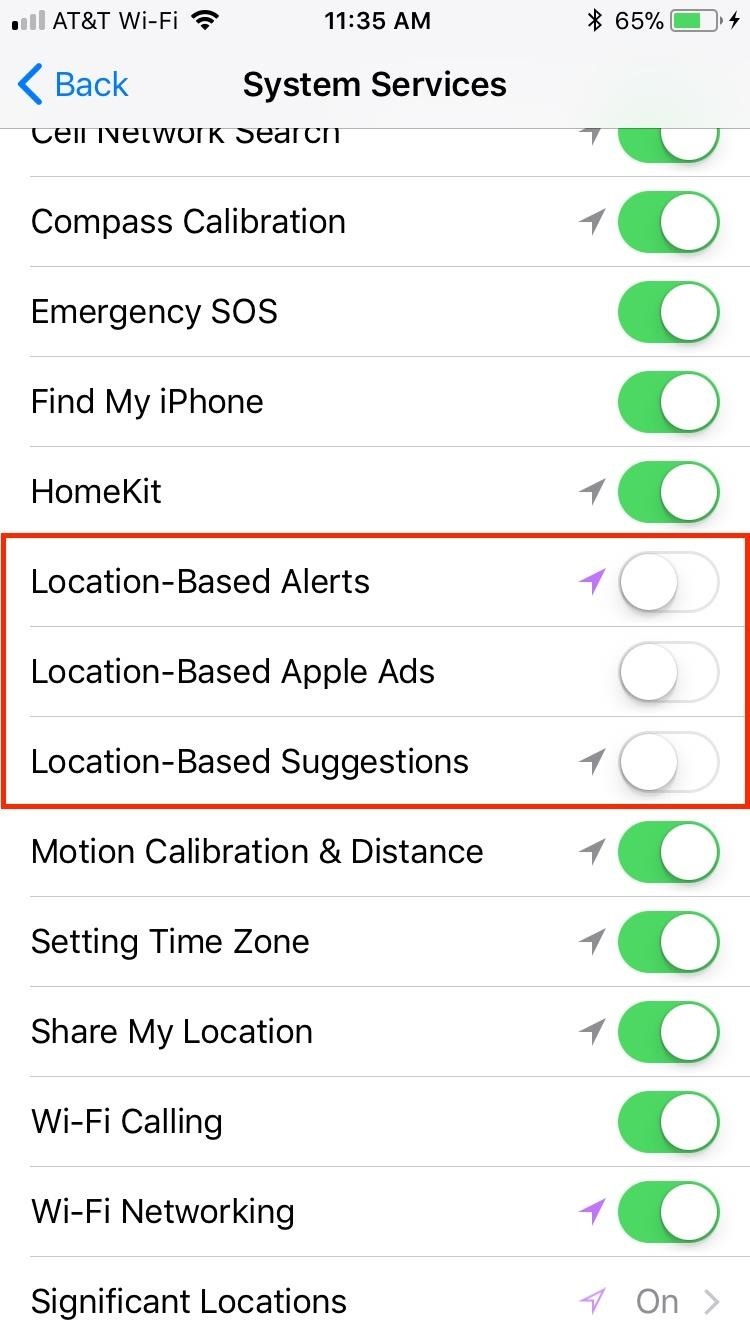
11. Turn Off Location-Based Alerts, Apple Ads & Suggestions
When enabled, location-based alerts, Apple ads, and suggestions all track your location to provide targeted notifications, advertisements, and options. To say that these options are not the most privacy-centric features in iOS 12 would be an understatement. In fact, these settings are actually quite creepy.
So if you don’t want to be specifically targeted by Apple wherever you go, open your Settings app, select „Privacy,“ and tap on „System Services“ on the following page. From there, you can deactivate „Location-Based Alerts,“ „Location-Based Apple Ads,“ and „Location-Based Suggestions“ by turning their corresponding toggles off.
12. Disable Share My Location
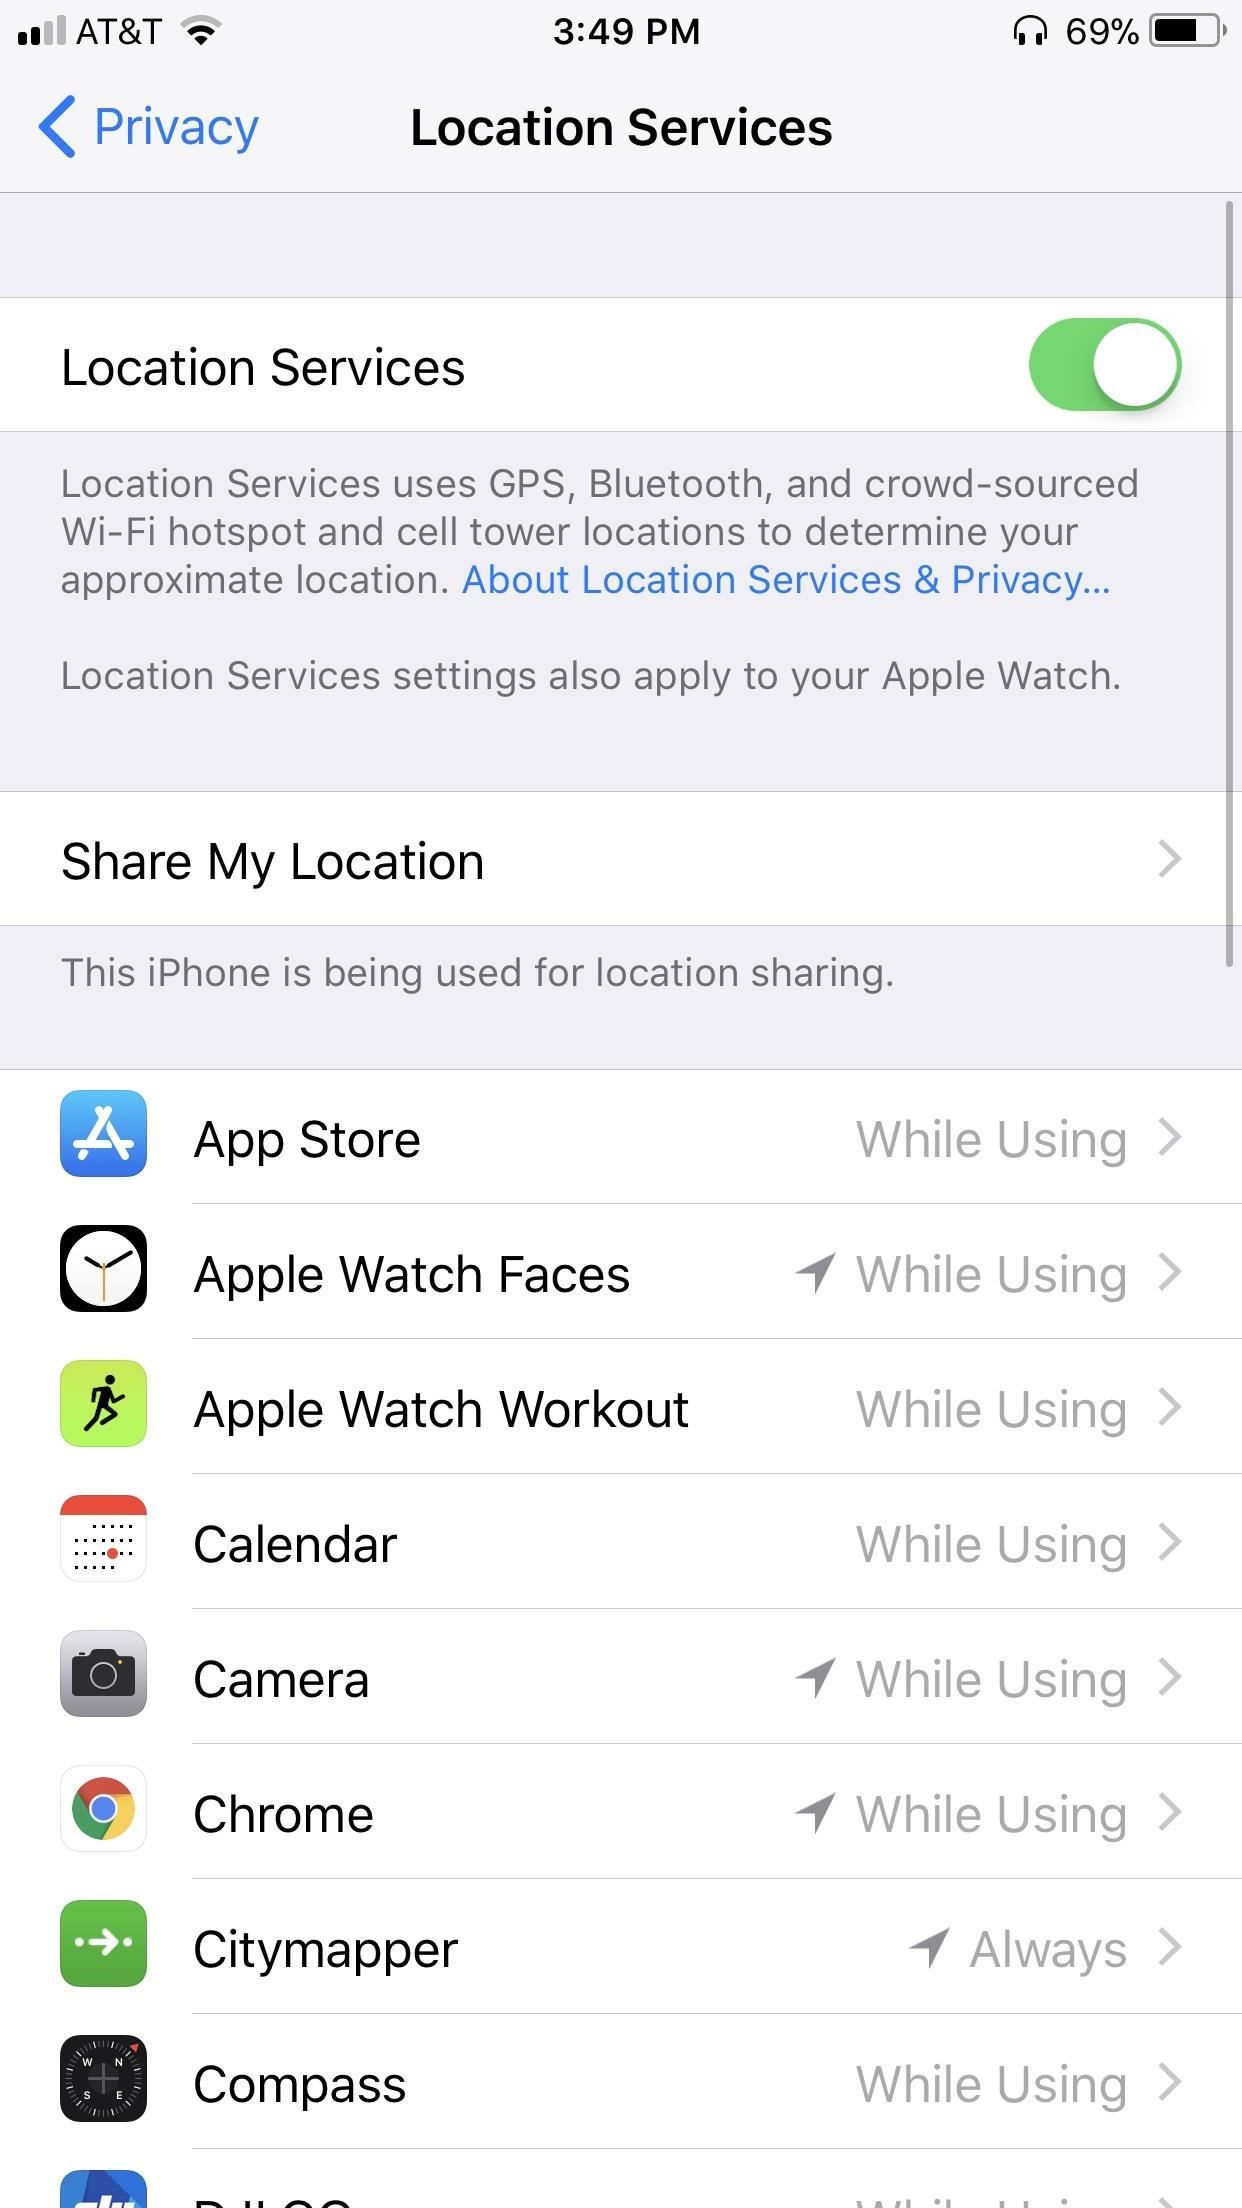
Having „Share My Location“ enabled lets you send your current whereabouts to a friend who requests it. While you need to mutually agree to this arrangement with another person using the Find My Friends app, there are ways of tracking your iPhone without your permission. If you’d like to avoid that risk altogether, disable the option by going to Settings –> Privacy –> Location Services –> Share My Location.
Alternatively, you can change the device that shares your location, if you have more than one attached to your Apple ID. You can also check with friends of yours you have approved to view your location.


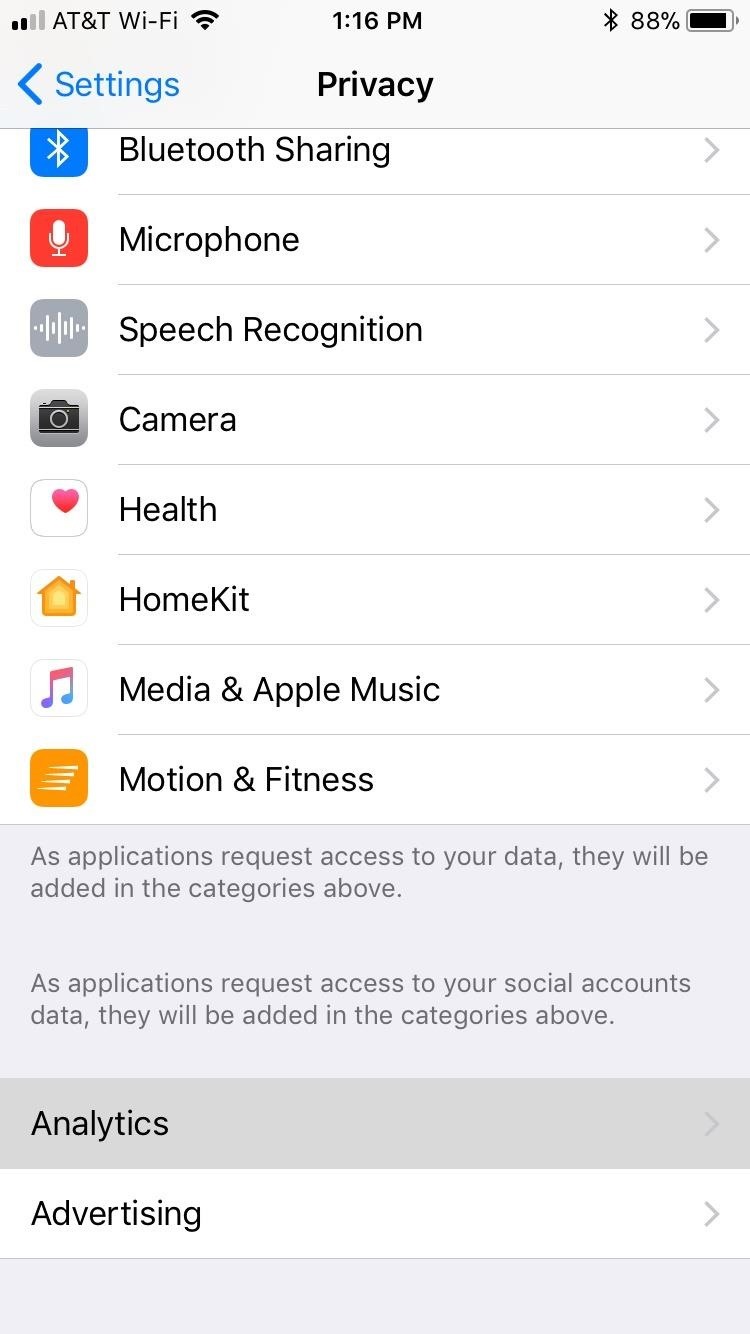
13. Turn Off Analytics
Formerly „Diagnostics & Usage, the „Analytics“ page found within your iPhone’s Settings app contains options that share data from your phone to Apple in an effort to help identify bugs in the system and make iOS better overall. Think of it as a beta test, only for the official iOS 12 release.
While this information gives Apple the ability to detect issues and help keep iOS 12 running smoothly, you wouldn’t be alone in feeling that your iPhone may be sharing too much without your knowledge. If you’d like to end hidden communication between your Device and Apple, go to Settings –> Privacy –> Analytics.
From there, you have many options you can disable:
- Turn off „Share iPhone & Watch Analytics“ to disable all analytics with Apple.
- „Share With App Developers“ shares your app data with that app’s developer. Disable this setting to close that line of communication.
- Disable „Share iCloud Analytics“ to prevent Apple from using your iCloud data to improve on apps and services associated with that information.
- „Improve Health & Activity“ shares your health and activity data with Apple to improve these services on your iPhone. Disable this feature if you don’t want Apple to know about such private information.
- „Improve Health Records“ shares pertinent health conditions such as medications, lab results, and other conditions with Apple. Disable this feature as you did with health and activity above.
- „Improve Wheelchair Mode“ will send Apple your activity data if you use a wheelchair. Again, turn this feature off as you did „Improve Health & Activity,“ regardless of whether you’re in a wheelchair or not.

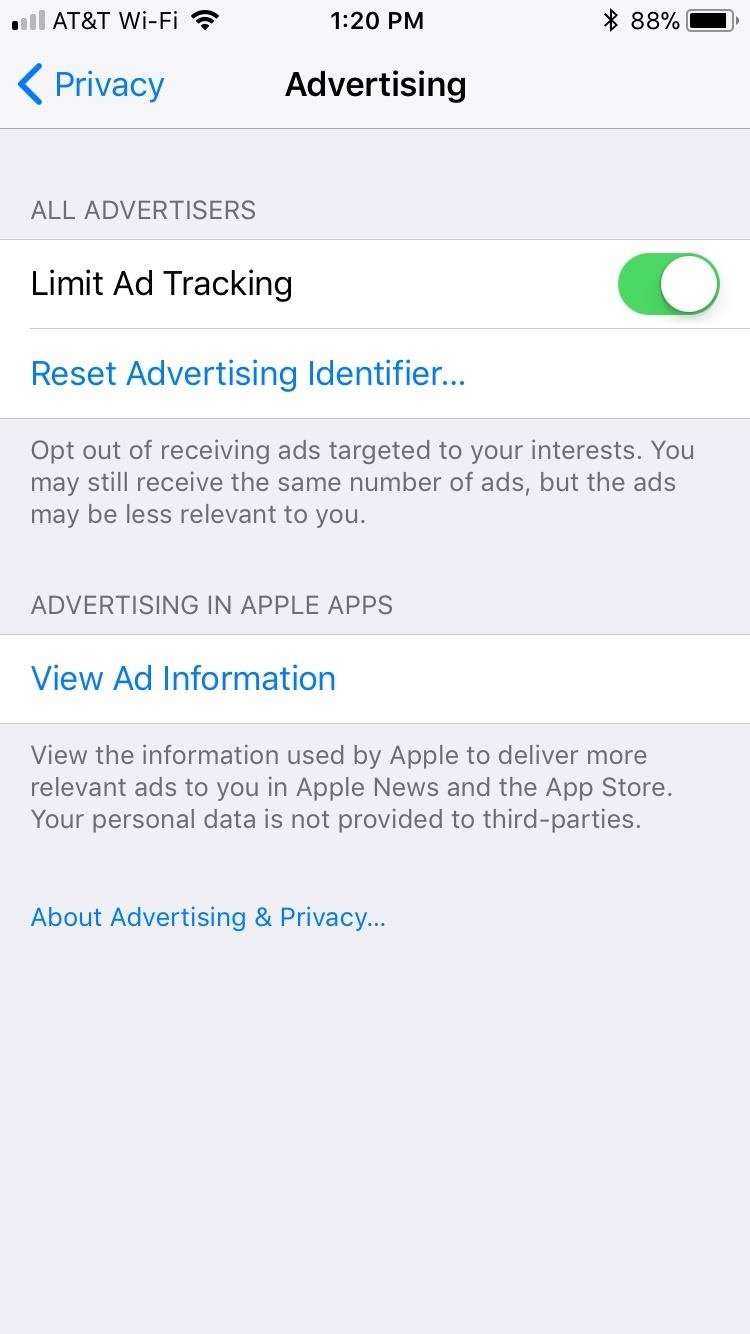
14. Limit Ad Tracking
„Limit Ad Tracking“ can be enabled if you prefer your ads to be directly targeted towards you and your interests. If you’re more focused on privacy, however, letting Apple share your data with advertisers may not be to your liking. This setting is one you actually turn on instead of the other way around. So head to Settings –> Privacy –> Advertising, then enable „Limit Ad Tracking.“
Notice how the option is Limit Ad Tracking, not Stop Ad Tracking. Even with this setting enabled, Apple claims that your iPhone connectivity, time setting, type, language, and location can be used to target advertising. If you disabled Location-Based Ads, location targeting will not apply to you, but all others will. Tap „View Ad Information“ to learn more.

15. Prevent Replying in Messages
Introduced in iOS 10, your iPhone gives you the option to 3D Touch messages to reply from your lock screen. While convenient, the feature is also easily accessed by other people. So if you’re worried about those around you replying to incoming messages on your iPhone, you might want to disable this option. Be sure to check out the article below to see how.
16. Disable Raise to Wake
With „Raise to Wake“ enabled, you’ll simply need to raise your phone from a flat position to wake it up. As natural and convenient as this feature is, it does pose a privacy risk. If your iPhone turns face-up accidentally, for instance, anyone within view of your iPhone’s display may see messages and notifications that you want to keep private.
To avoid this scenario, head over to your iPhone’s Settings app and select „Display & Brightness.“ From there, simply tap on the toggle next to „Raise to Wake“ to disable the feature. If you don’t want to disable „Raise to Wake“ but still want your content private on the lock screen, you can disable previews instead.


17. Stop Using Lock Screen Widgets
Lock screen widgets are great for staying on top of your messages, notifications, calendar — basically whatever else you need to know without having to unlock your iPhone. The obvious downside is you don’t need to unlock your iPhone to view important information. Anyone can pick up your iPhone and potentially see who’s texting you what, in addition to finding out your agenda is for the day.
To avoid this potential breach in privacy, you could hit „Edit“ at the bottom of the lock screen, then delete all widgets. However, you will lose those widgets when you’ve unlocked your phone as well, not just on the lock screen. So if you want to deactivate the widgets for only the lock screen, simply head to the article below.
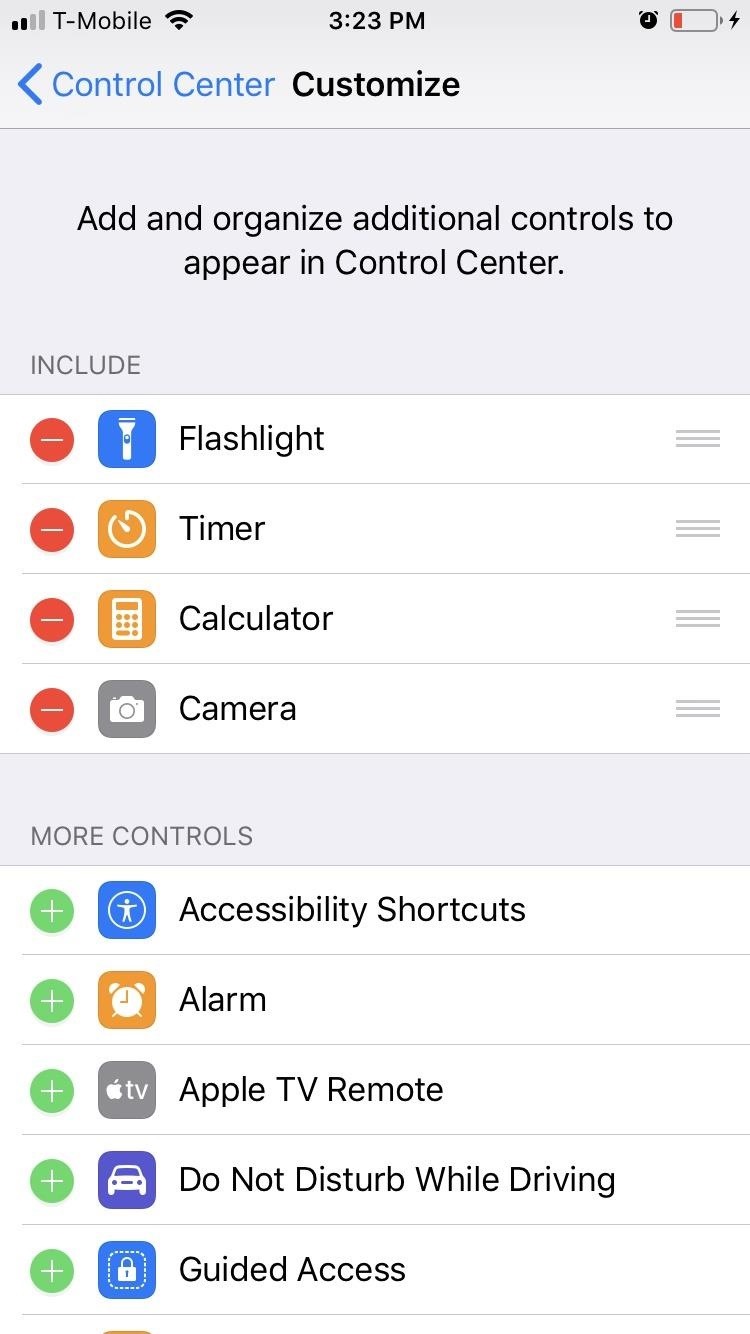
18. Disable Control Center on Lock Screen
The Control Center went through a major revamp on iOS 11 and gave us the ability to customize the toggles with a number of features and options. Unfortunately, these nifty additions can be detrimental to you and your iPhone in terms of privacy and security.
While most content-sensitive apps require a passcode from the lock screen to access, there are apps that, at the very least, give users limited access without having to unlock the iPhone. If you have Notes activated, for instance, anyone can freely access it straight from the Control Center to write notes, though they cannot view written notes without unlocking your iPhone first.
You can disable any apps from the Control Center that you don’t want people having access to, but that means you won’t be able to access them when your iPhone is unlocked, either. An alternative option is to disable Control Center entirely from the lock menu by going to Settings –> Touch ID & Passcode and disabling the switch next to „Control Center.“ We’ll talk more about Passcode Lock later.
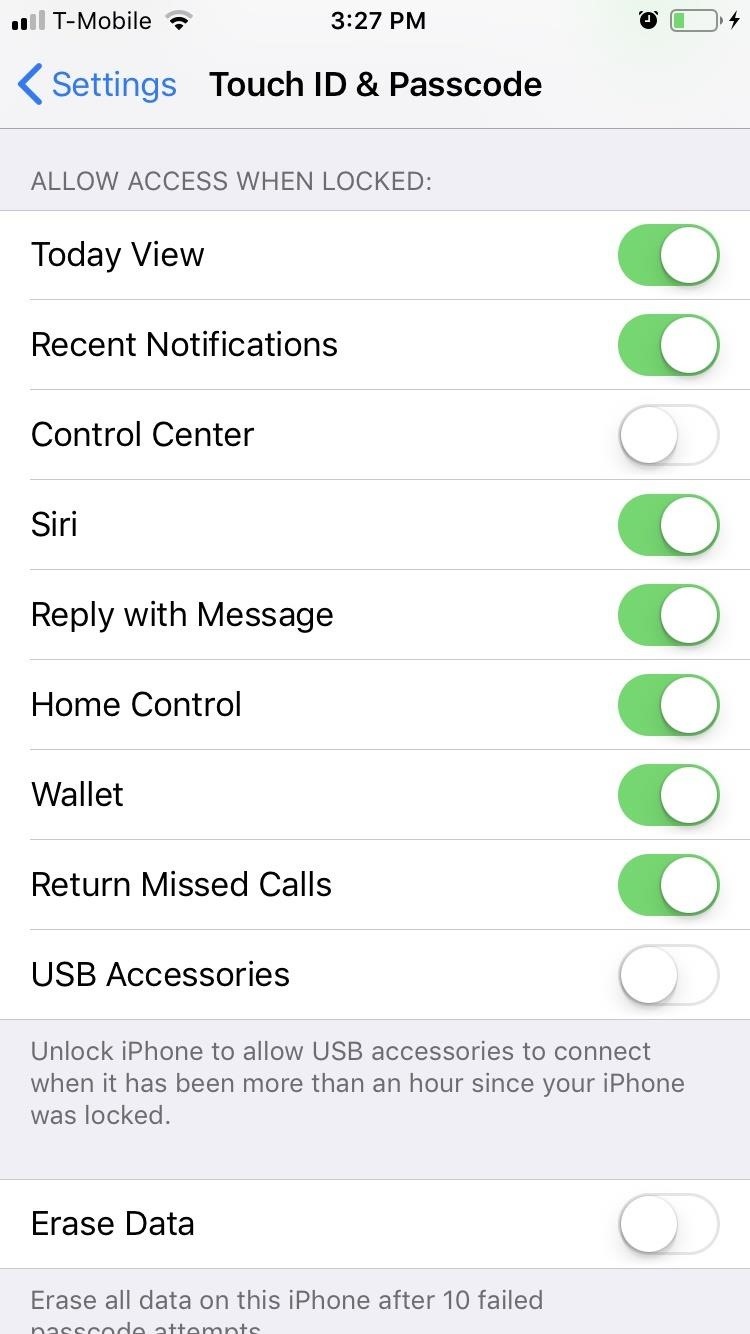
One app that should be disabled from Control Center is Wallet. While you do need your Touch ID, Face ID, or passcode to access any credit cards stored in your iPhone, other types of cards, like Starbucks, travel passes, and various other loyalty cards, do not. So if you want to prevent others from gaining access to these forms of currency, you’ll need to disable Wallet from Control Center.
To further customize options in your Control Center, open your Settings app, select „Control Center,“ then tap on „Customize“ on the following page.

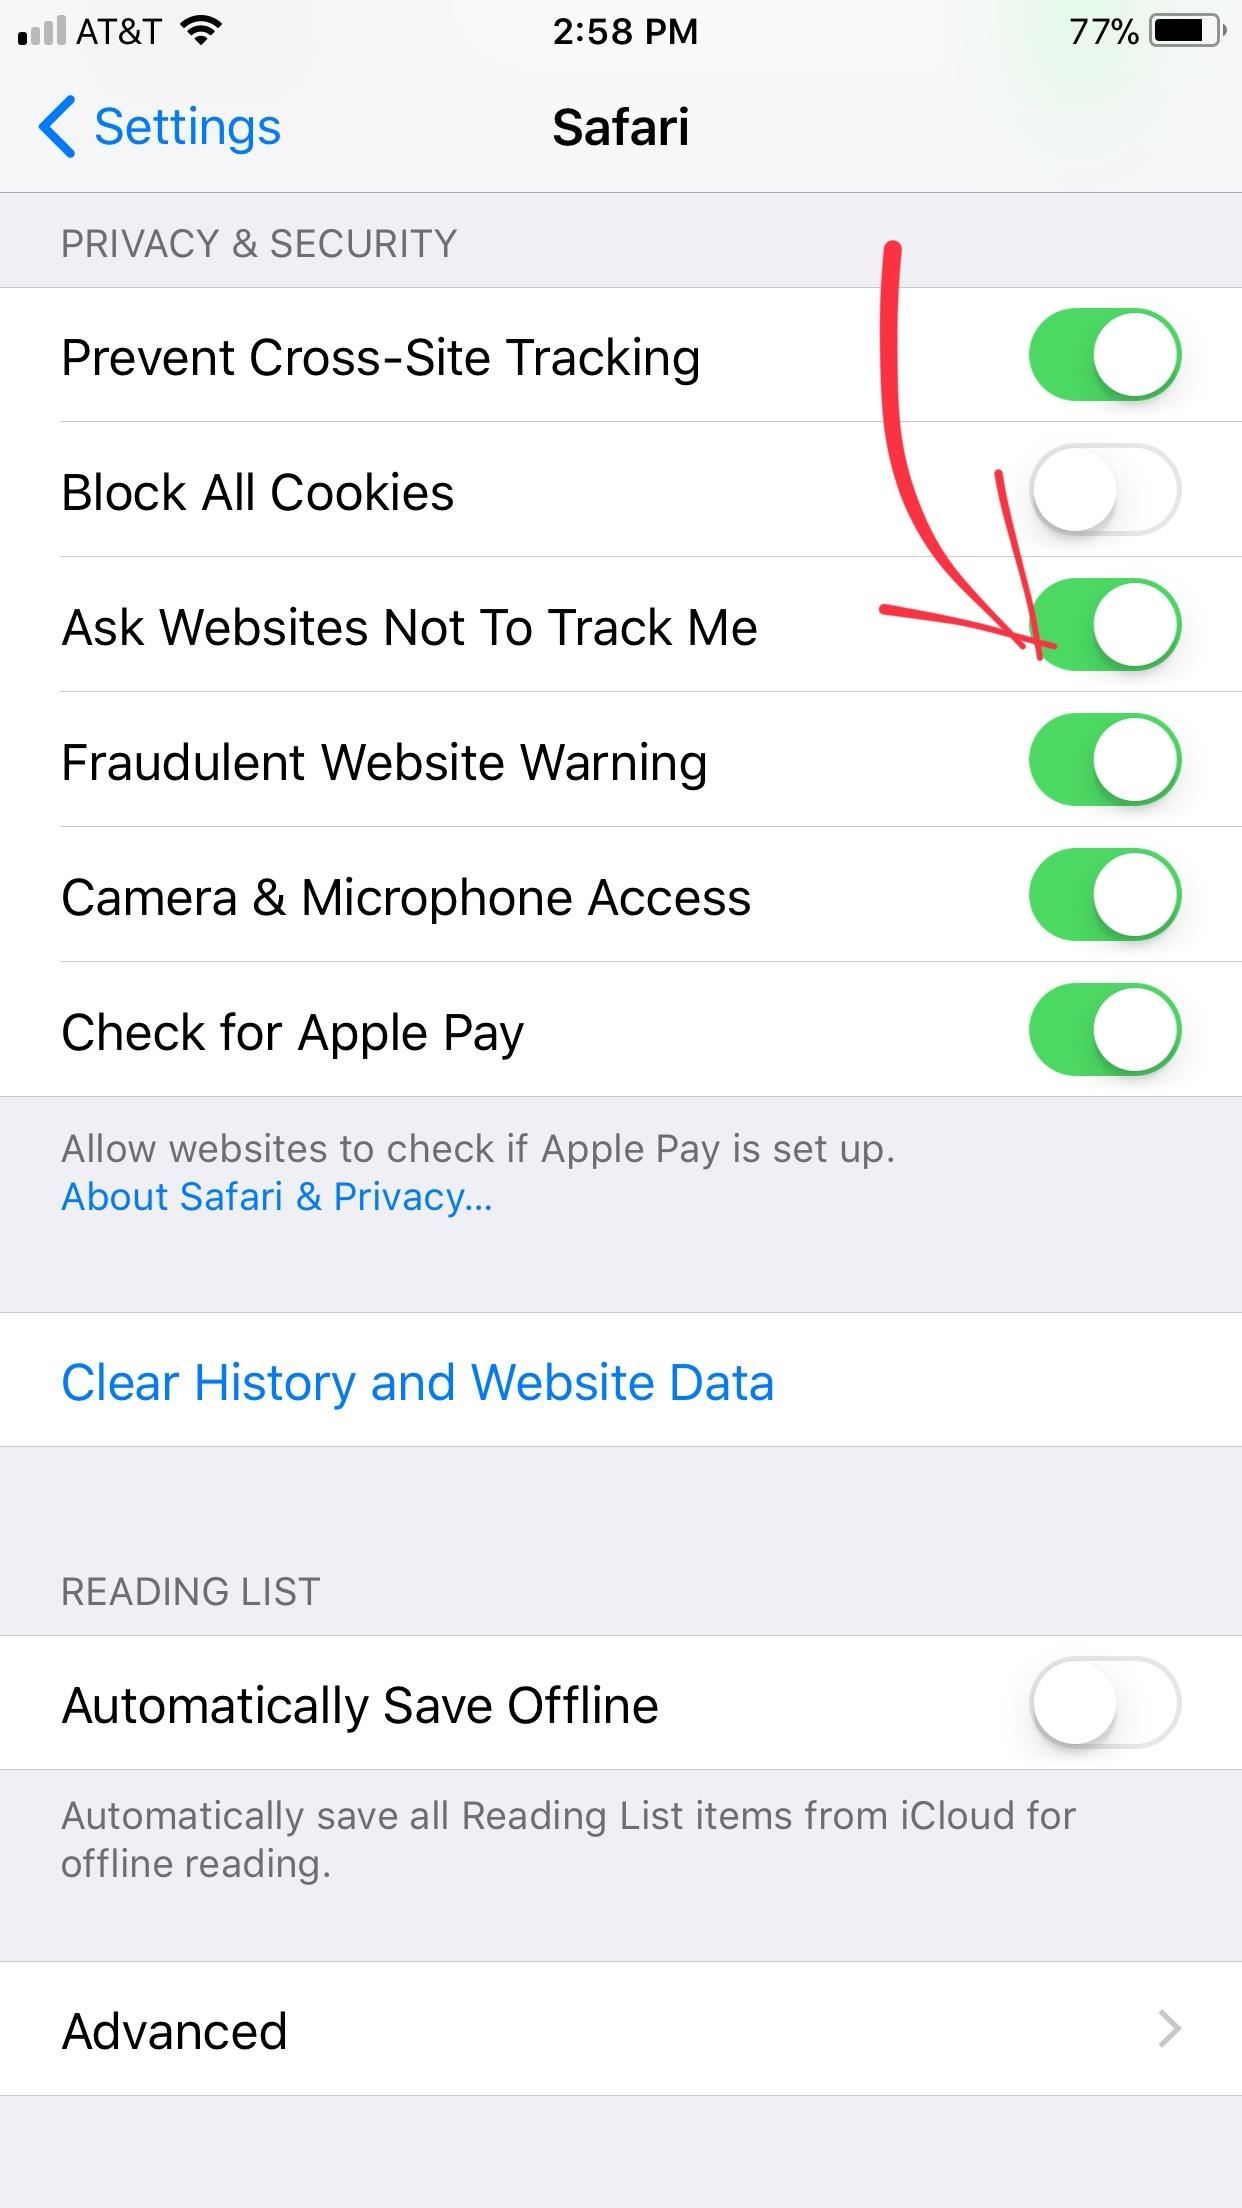
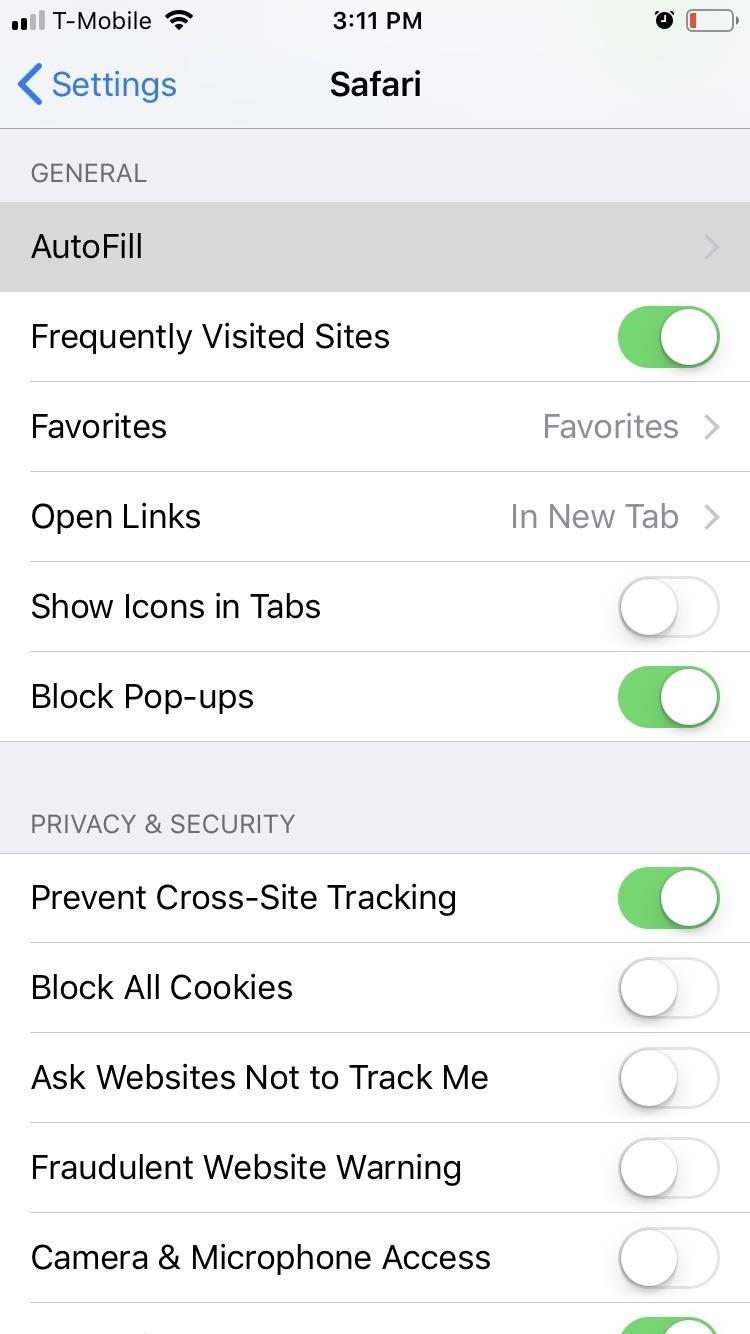
19. Ask Websites Not to Track Me on Safari
„Ask Websites Not to Track Me“ gives you the option to decide whether or not to allow Safari to share your iPhone’s IP address with the websites you visit. For obvious privacy reasons, you’ll most likely not wish to share this information with sites, so to enable this setting, tap on „Safari“ within the Settings app, then enable the switch next to „Ask Websites Not To Track Me.“
Notice that the setting says Ask. Websites don’t have to comply, so there’s still a chance you’re being tracked. To learn more about this issue, check out the following guide.
20. Block Cross-Site Tracking
Safari has alwasy blocked third-party cookies, but those third parties have always been able to get around the restriction with first-party cookies — cookies the site uses for the site itself. Think of it as nefarious advertisers leeching off a site’s own cookies that are needed to make your visit more convenient. If that’s all sounds confusing, check out our full guide below on what cross-site tracking is, why it matters, and how to stop it.
21. Block All Cookies
As just discussed, cookies allow websites to save bits of your information for faster reloading next time you visit. And while this feature makes web browsing more convenient, cookies aren’t exactly a benefit in terms of overall privacy.
Since iOS 11, Apple has streamlined the blocking of cookies by doing away with various options in favor of a blanket ban on all. To disable cookies, open the Settings app and tap on „Safari.“ From there, simply tap on „Block All Cookies“ to turn the option on. While you may notice a difference in performance on some sites, at least you know you’re securing your privacy.


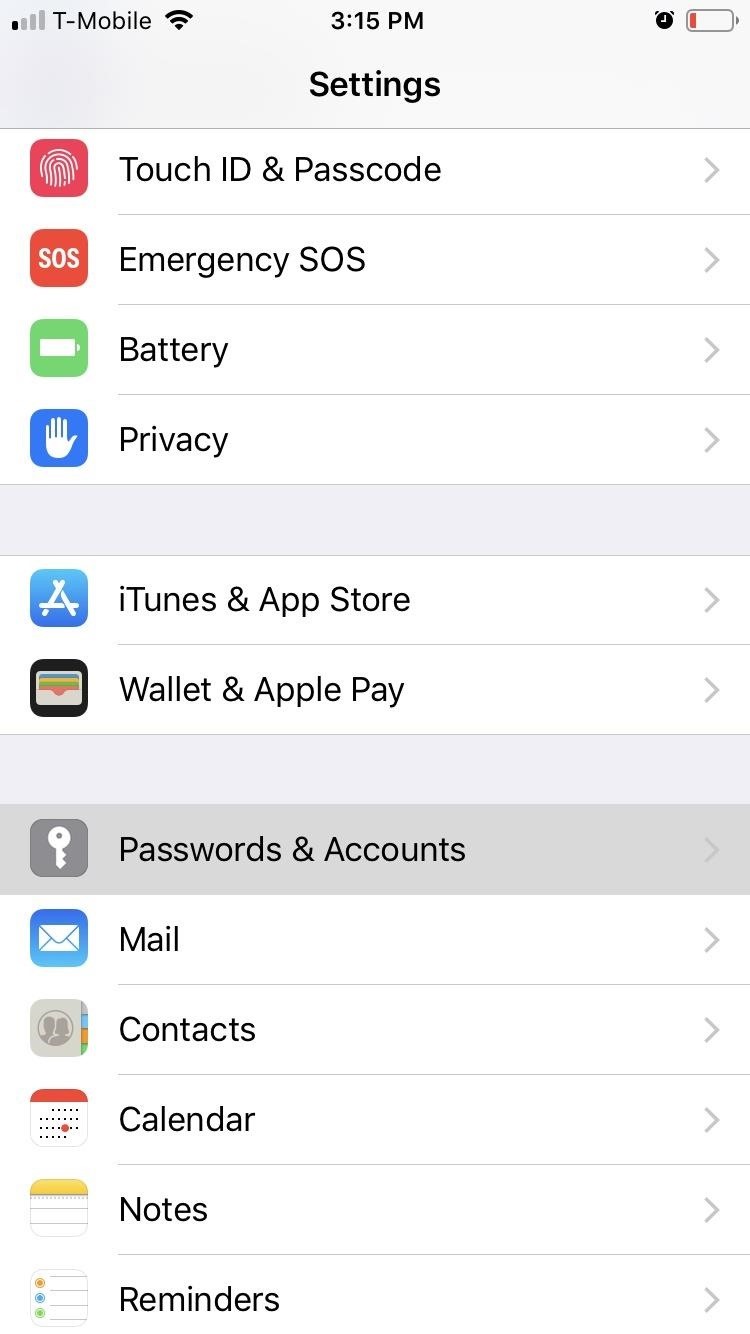
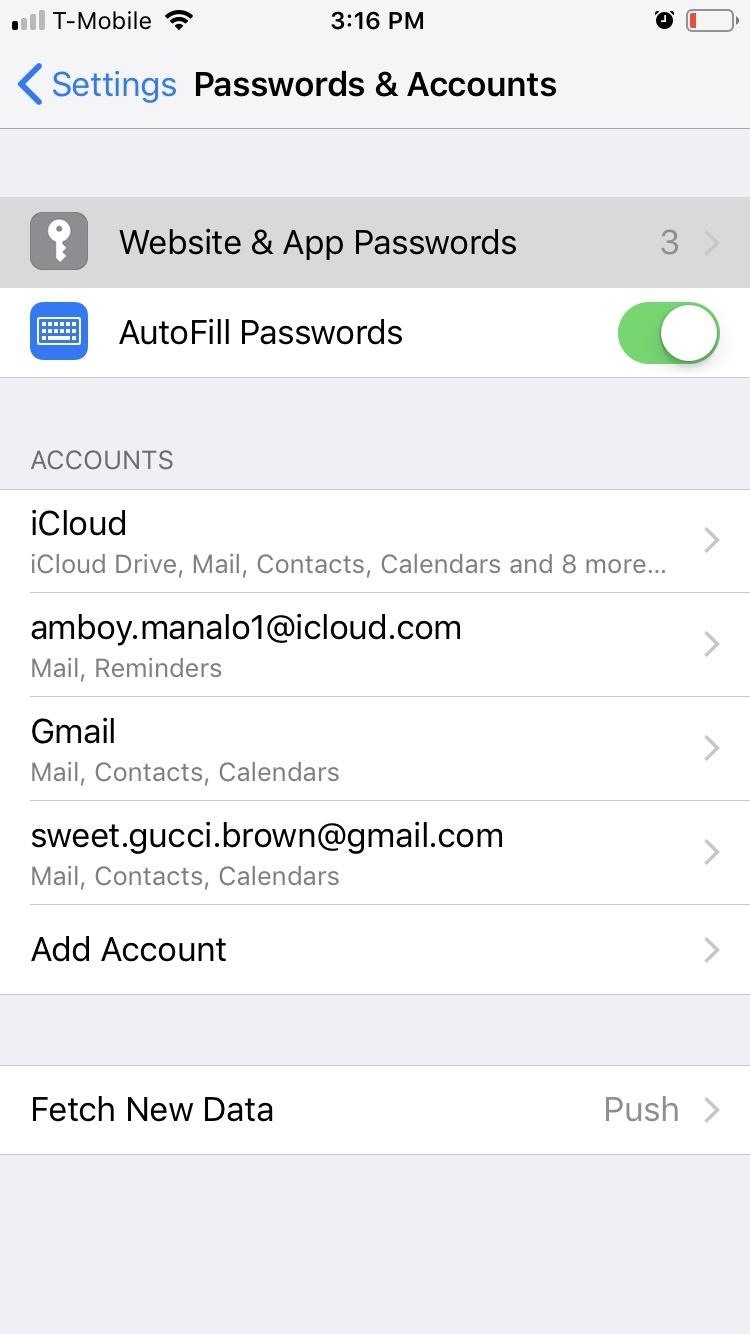
22. Remove App & Website Passwords
Your iPhone and iCloud account have a built-in password manager to make entering passwords easier and more secure. While these passwords are protected by Face ID, Touch ID, or your iPhone’s passcode, disaster will ensue if your iPhone gets breached, with the thief having unfettered access to all of your passwords.
To protect yourself and manage passwords saved, visit Settings –> Passwords & Accounts –> App & Website Passwords, and input your passcode or Touch ID to view your saved passwords. To delete passwords individually, swipe left on each password and hit „Delete.“ To erase en masse, tap „Edit“ in the top-right corner, then select each password you’d like to remove. Tap „Delete“ in the top-left corner to finish up.

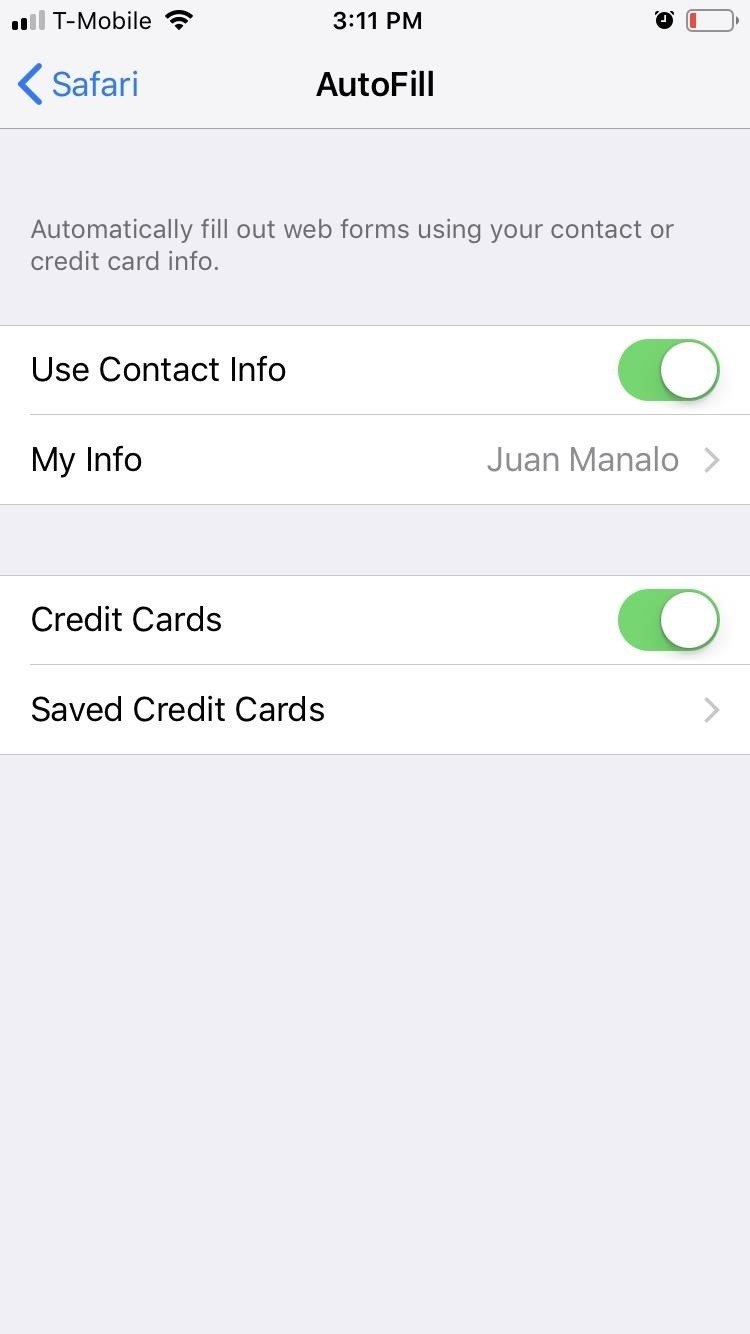
23. Disable Certain AutoFill Data
Besides keeping your passwords, your iPhone has the ability to store your personal information for AutoFill. This handy feature makes filling out forms online or in apps a breeze, as your iPhone can now automatically enter pertinent information such as your name, phone number, credit card numbers, and home address, to name a few.
Obviously, the downside is this personal information can be a potential boon for any would-be thief that manages to get into your iPhone. To protect yourself, open Settings, tap on „Safari,“ and hit „AutoFill“ on the following page. From there, you can investigate what information is already saved, such as Contact Info and Credit Cards, or disable all by toggling each slider off.
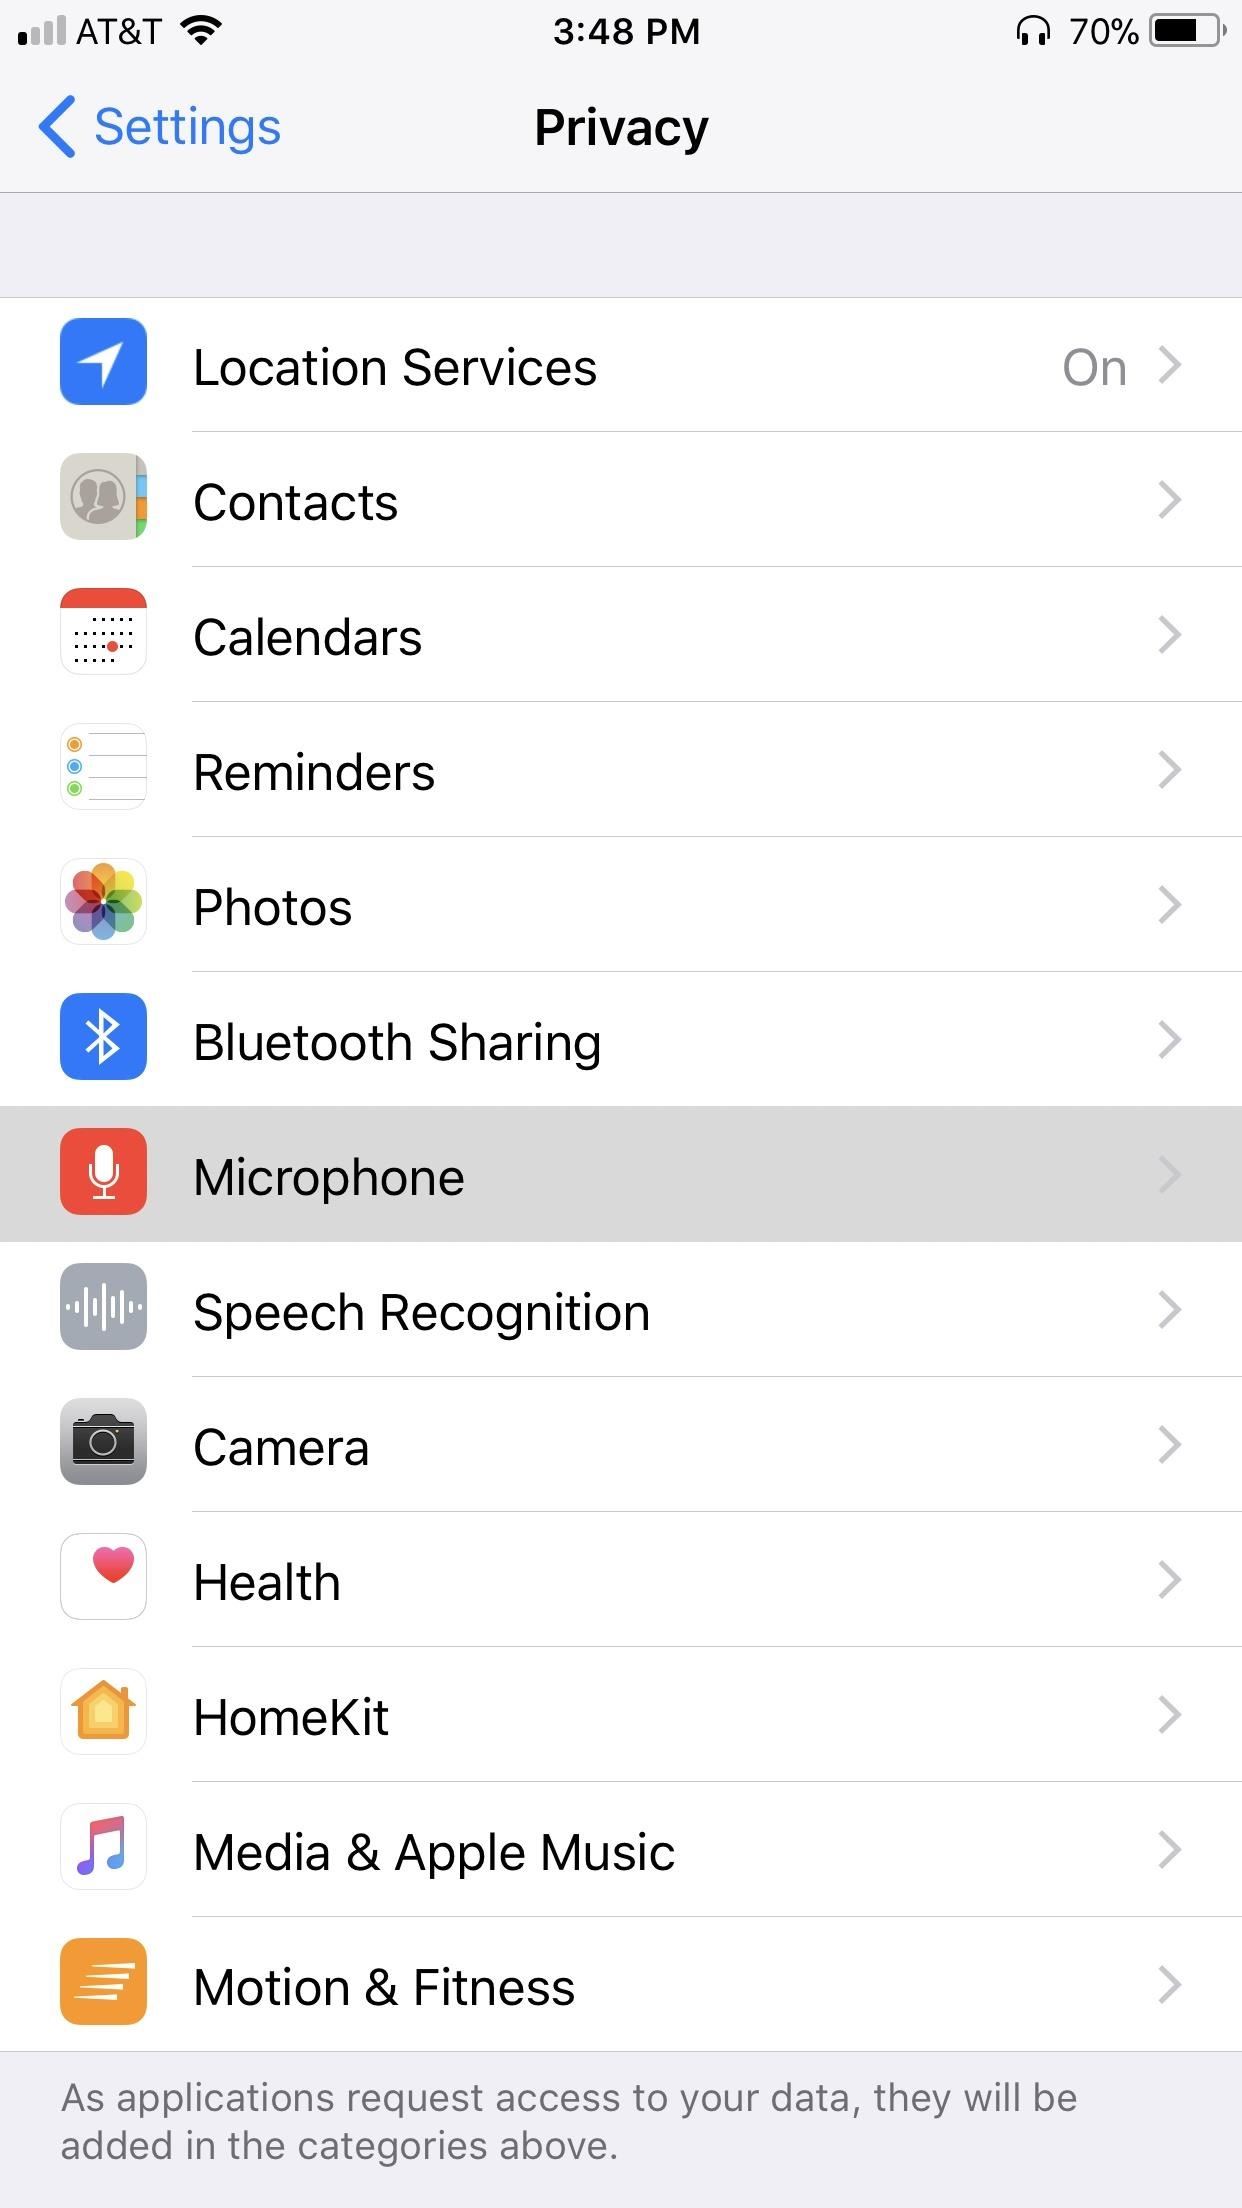
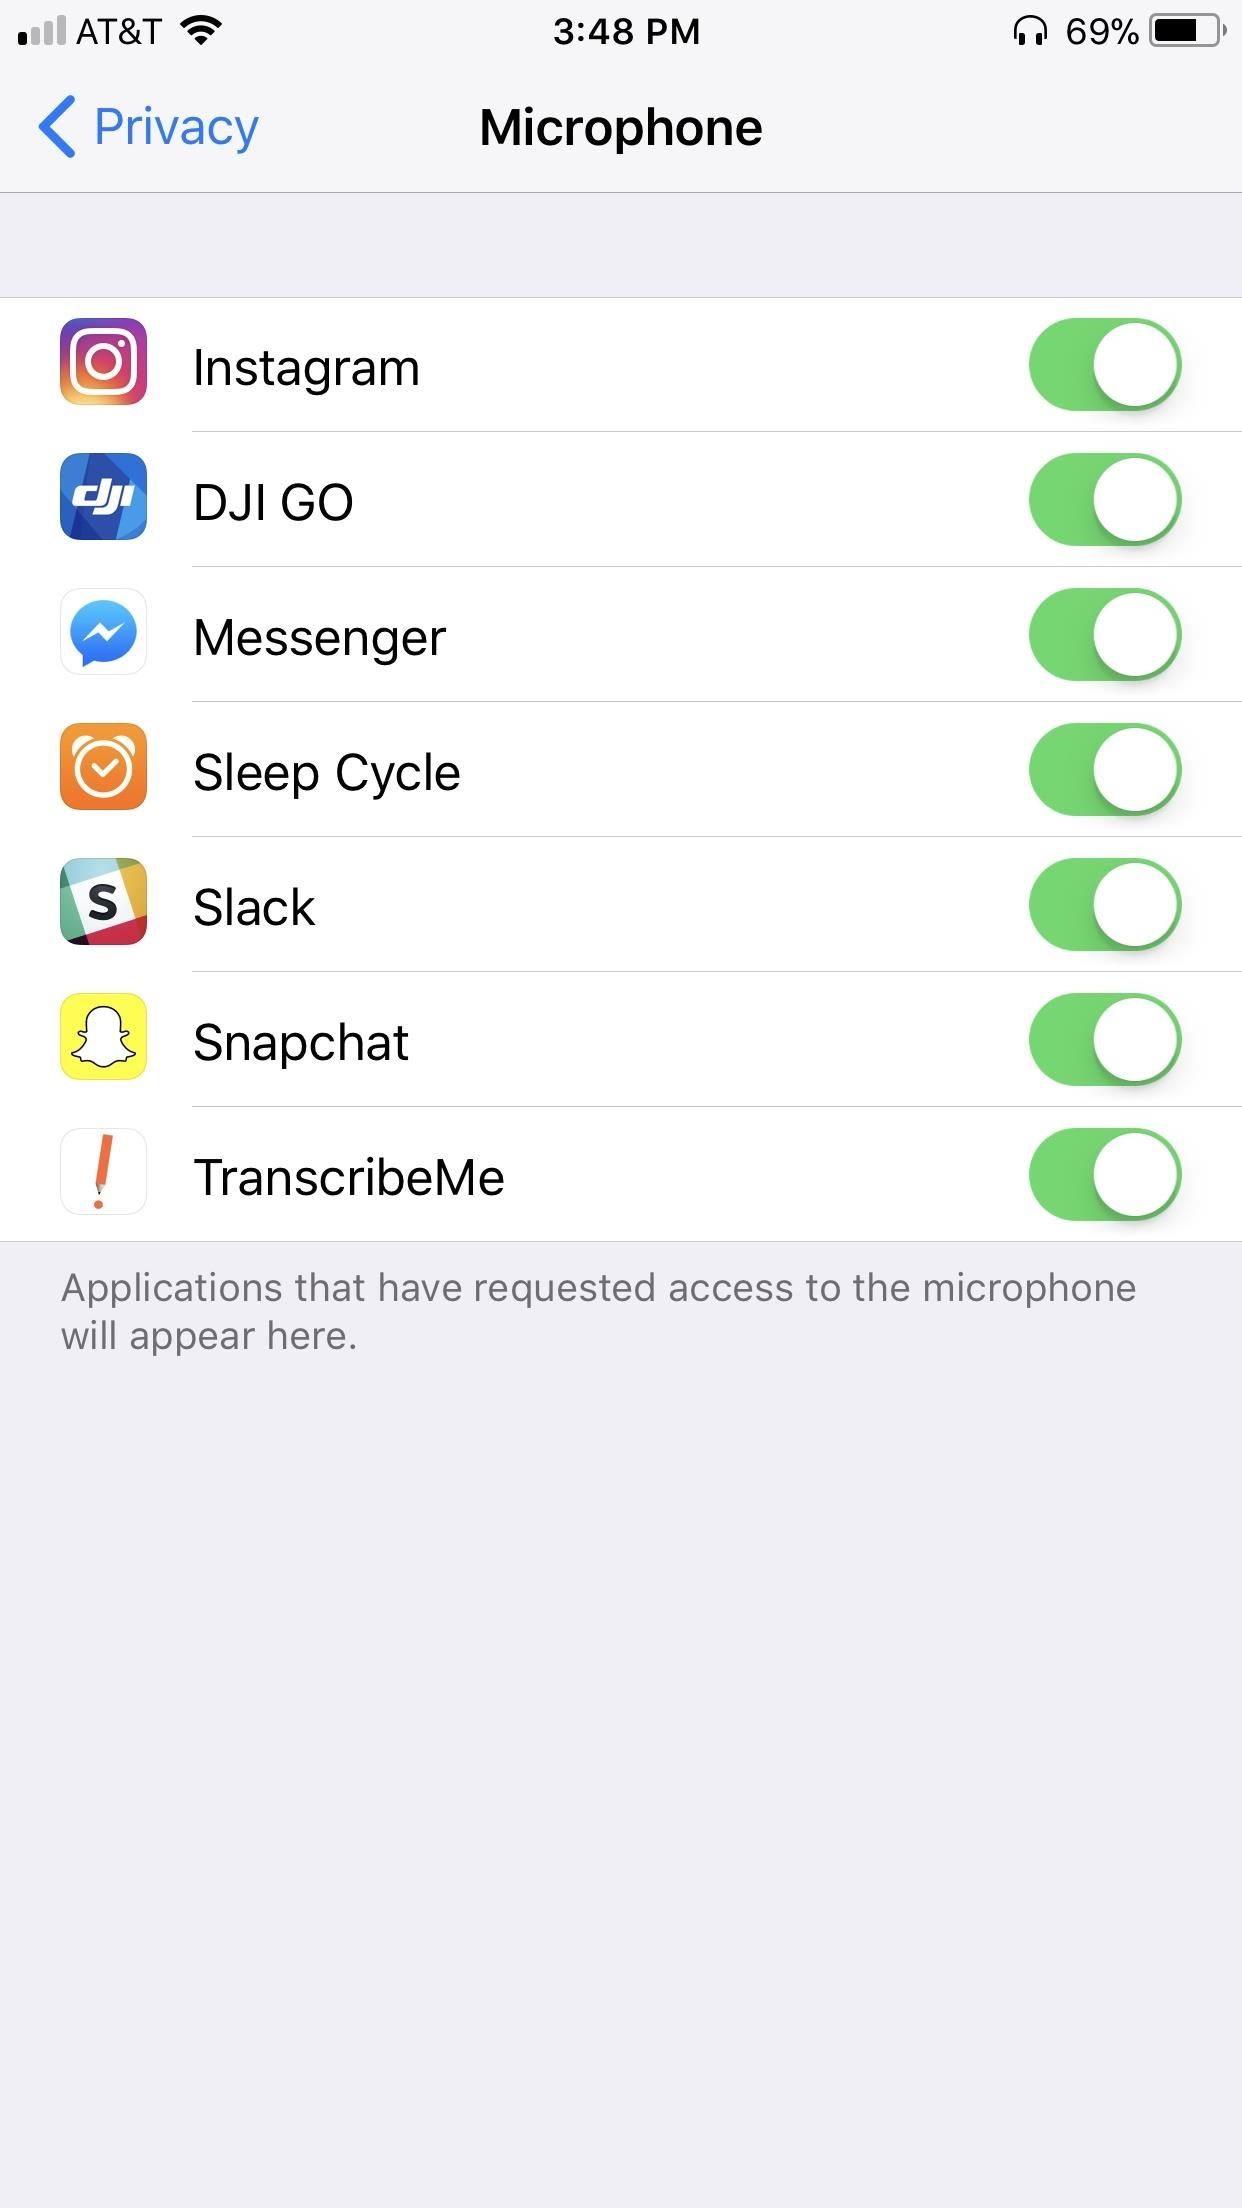
24. Turn Off Microphone Access for Apps
Many apps request microphone access for legitimate purposes. Waze, for instance, uses this access to let you speak to the app to aid in handsfree navigation. That said, there are sketchy apps out there that may not be as forthcoming with what they do when granted access to your iPhone’s microphone.
Naturally, you’ll want to manage which apps have access to your iPhone’s microphone, so open your Settings app and go to „Privacy“ and tap on „Microphone“ on the following page. Here, you will find a list of all apps that are approved to use your microphone. Disable any or all by tapping the toggle next to each app.
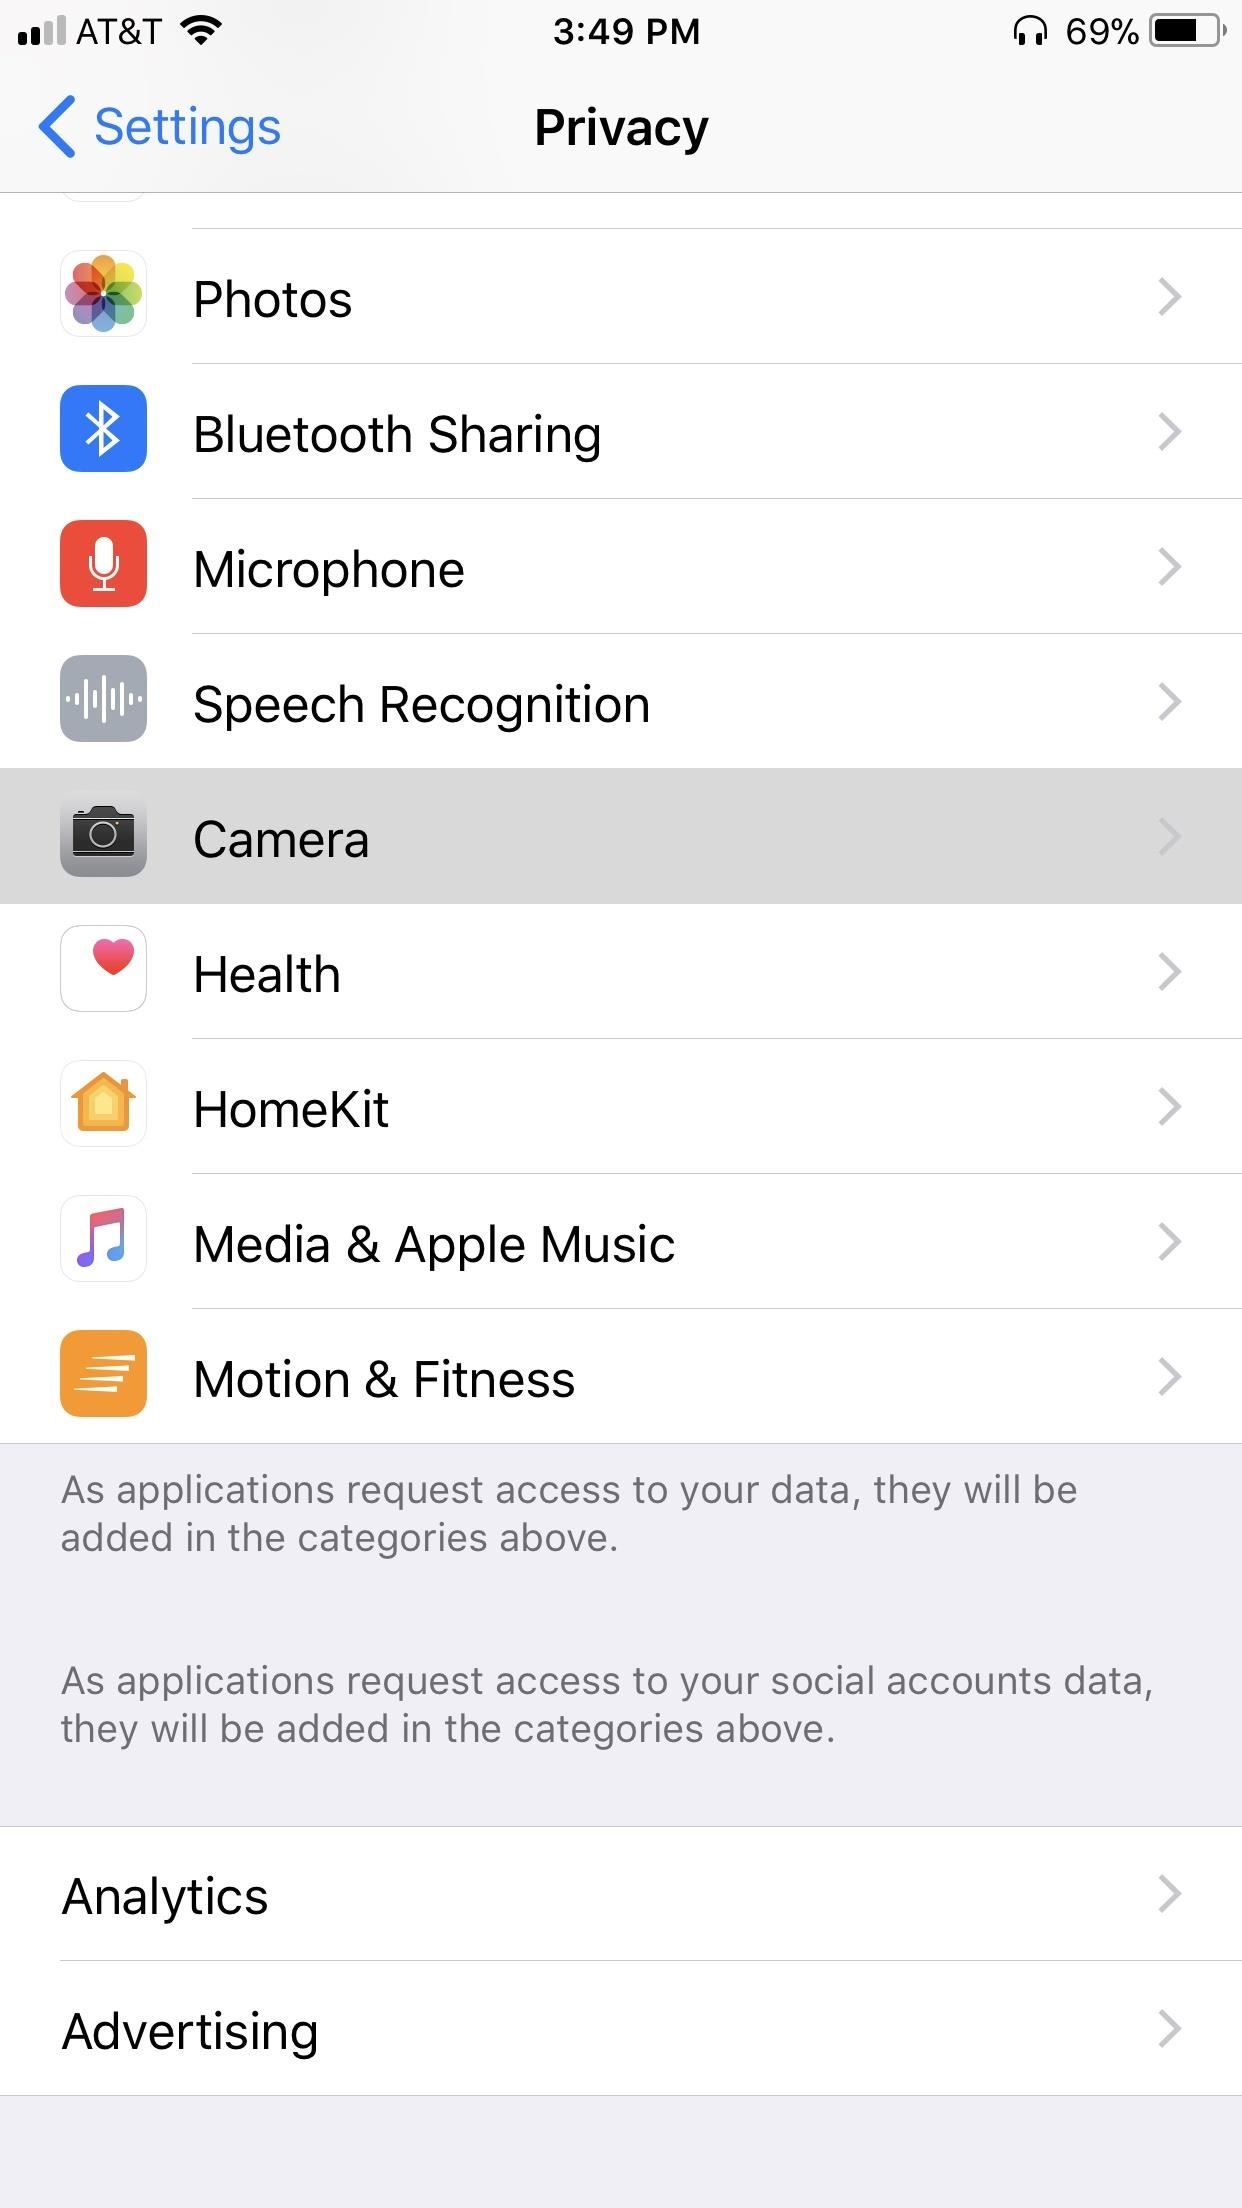
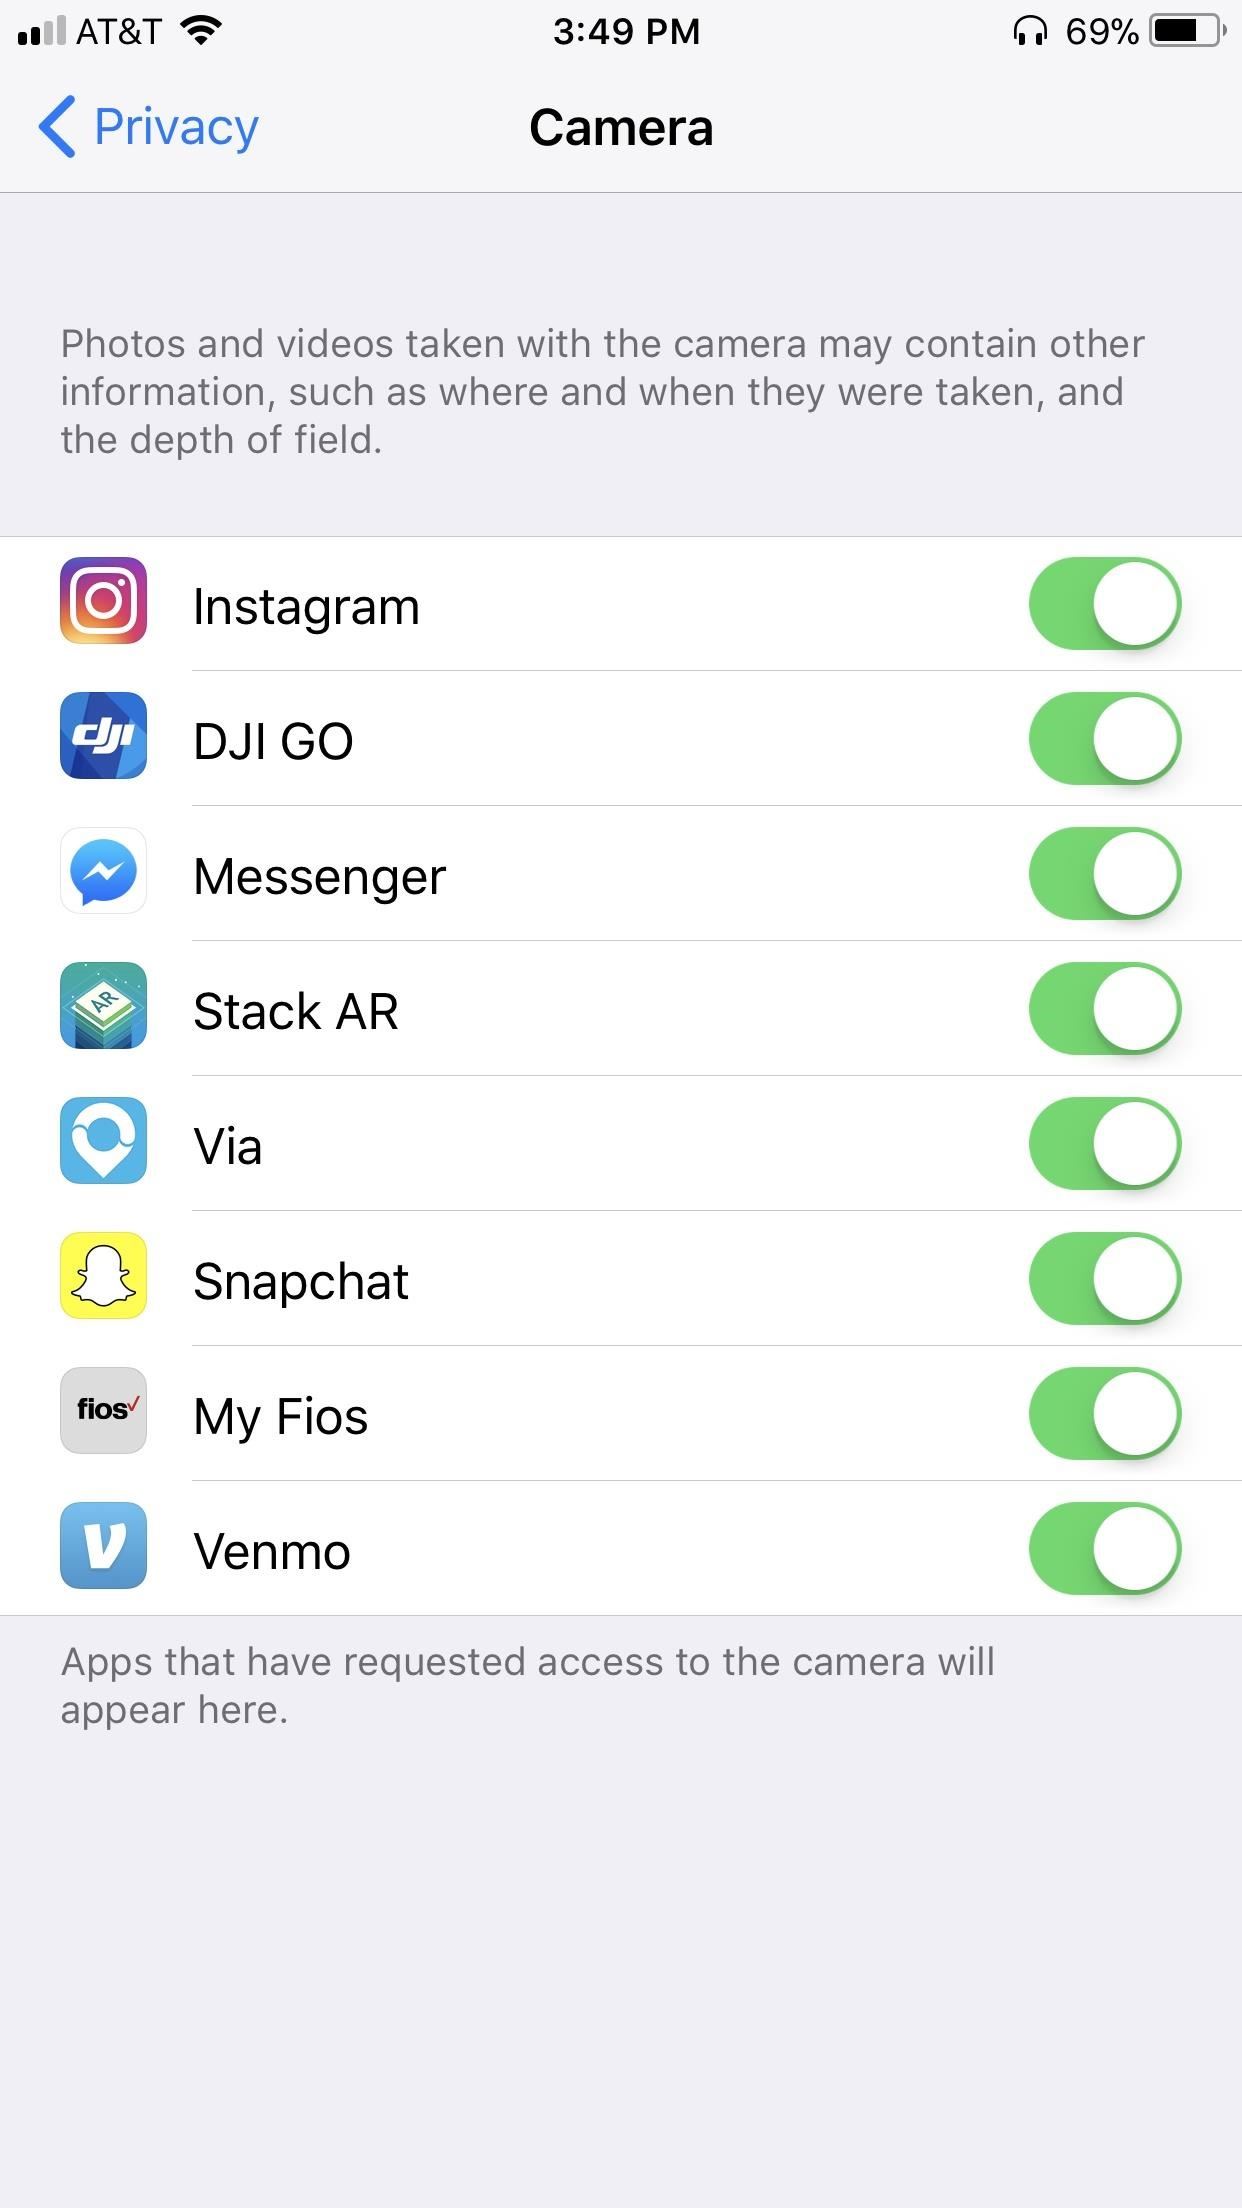
25. Disable Camera Access for Apps
Apps like Snapchat depend on camera access to function. The same can’t be said for many apps, however, and some may have gained unjustified access to your iPhone’s camera without you realizing. Because of this, we recommend making a habit out of periodically checking for any wayward apps that have been granted camera access and disabling them accordingly.
To do so, open your Settings app and select „Privacy,“ then tap on „Camera“ on the following page. From there, tap on the toggle next to any suspect apps to disable camera access on your iPhone.
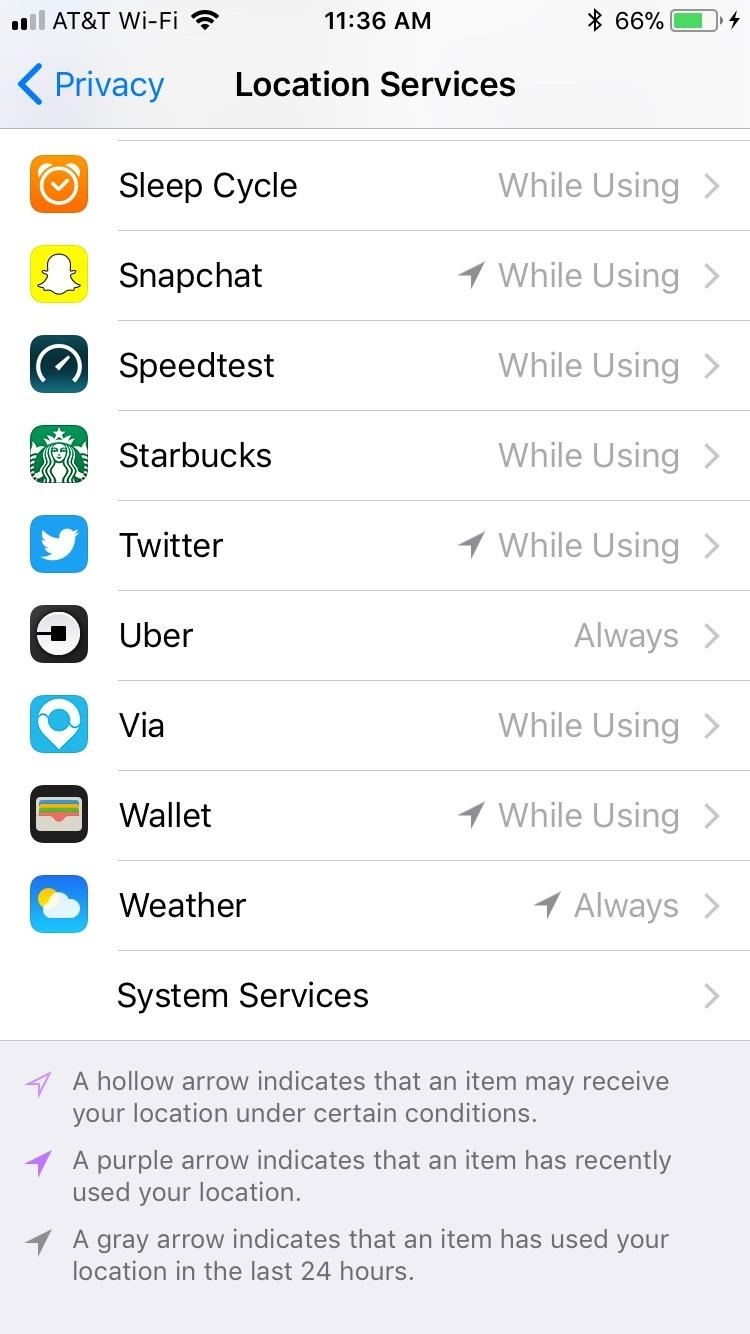
26. Turn Off Location Services for Apps
Location services are essential for navigation apps like Waze to work, as it enables GPS tracking to tag your location and give you directions accurately. In addition to that, apps like Snapchat can use your position when taking photos to apply exciting and unique filters that are only available where you currently are. Some apps, however, may not be as forthcoming about how they use your location data.
Needless to say, we recommend going to Settings –> Privacy –> Locations Services to disable the service for certain apps. And while you have the option to kill „Location Services“ entirely, this will cause you to lose access to all location functions. It’s a much better option to go through each app, and make sure to set the apps you don’t want to have access to your location to „Never.“
27. Empty Out Recently Deleted Photos
Apple saves your deleted photos in a „Recently Deleted“ folder for 30 days before permanently erasing them to make retrieval of accidentally deleted photos easier. If someone were to gain access to your phone, however, they’d have access to any photos deleted within 30 days from that time.
So, in order to avert potential disaster, always be sure to head to the Recently Deleted folder within the Photos app and empty it out of unwanted photos whenever you delete photos from your other galleries.

28. Use Biometrics for App Store Purchases
Let’s say you decide to buy an app. You leave your iPhone for a moment to attend to something important, but as you do, someone manages to break in and gain access to the App Store. Because you just purchased an app, the App Store may not require your password to buy another app, so this person can go crazy buying expensive apps at your expense.
As a preventative measure, it’s always a good idea to require your authorization before purchasing any apps. So if you use Touch ID or Face ID, head over to Settings –> Touch ID & Passcode (or Face ID & Passcode on iPhone X). From there, tap on the toggle next to „Touch ID for iTunes & App Store“ to enable the feature. Enter your iTunes password to confirm and you’ll be all set.

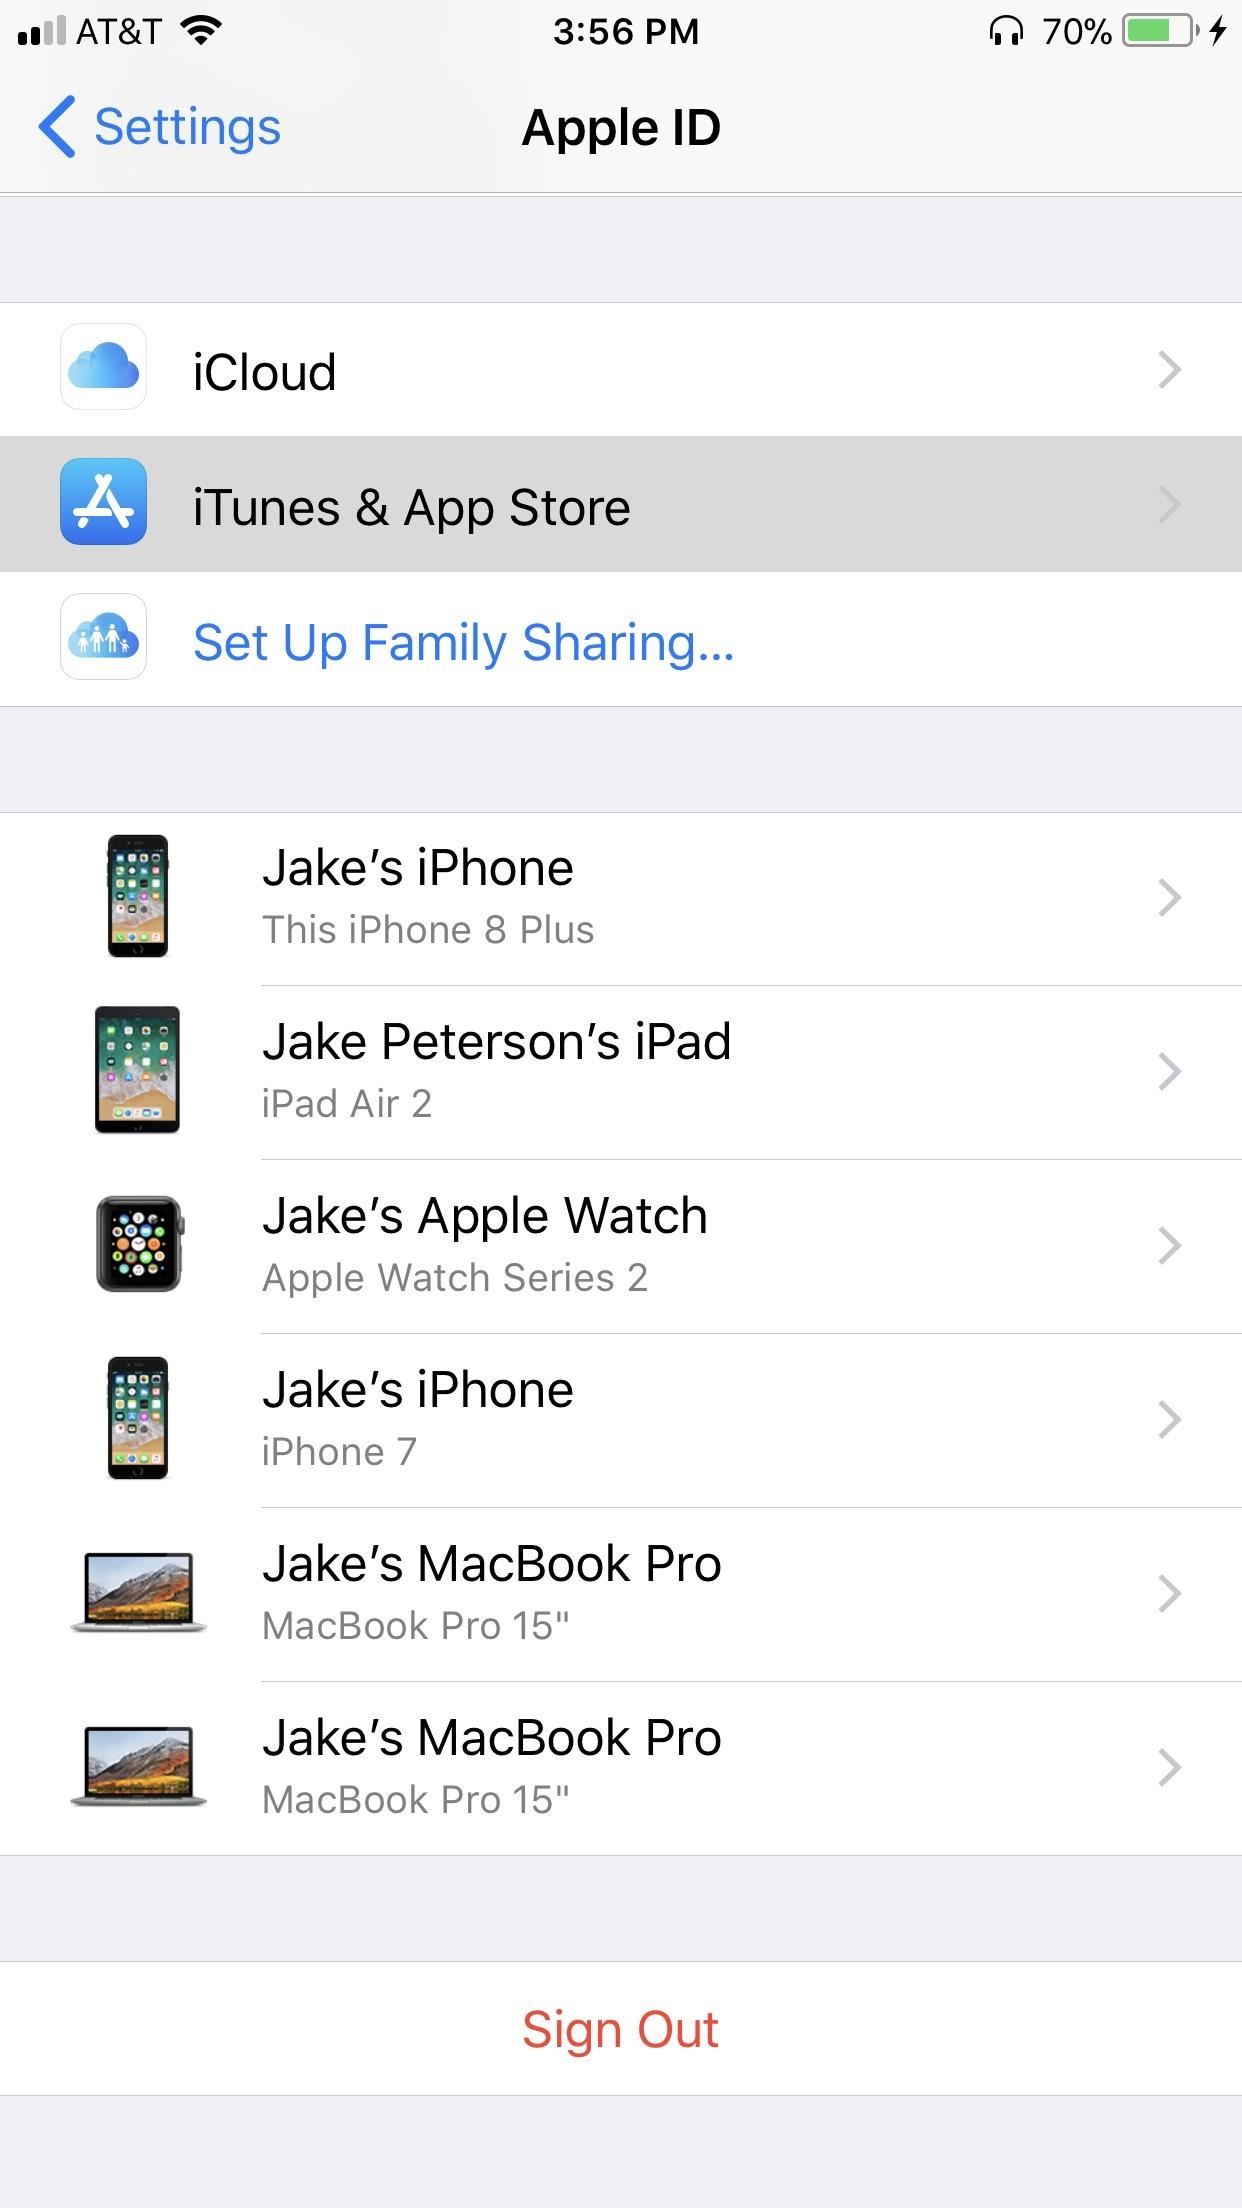
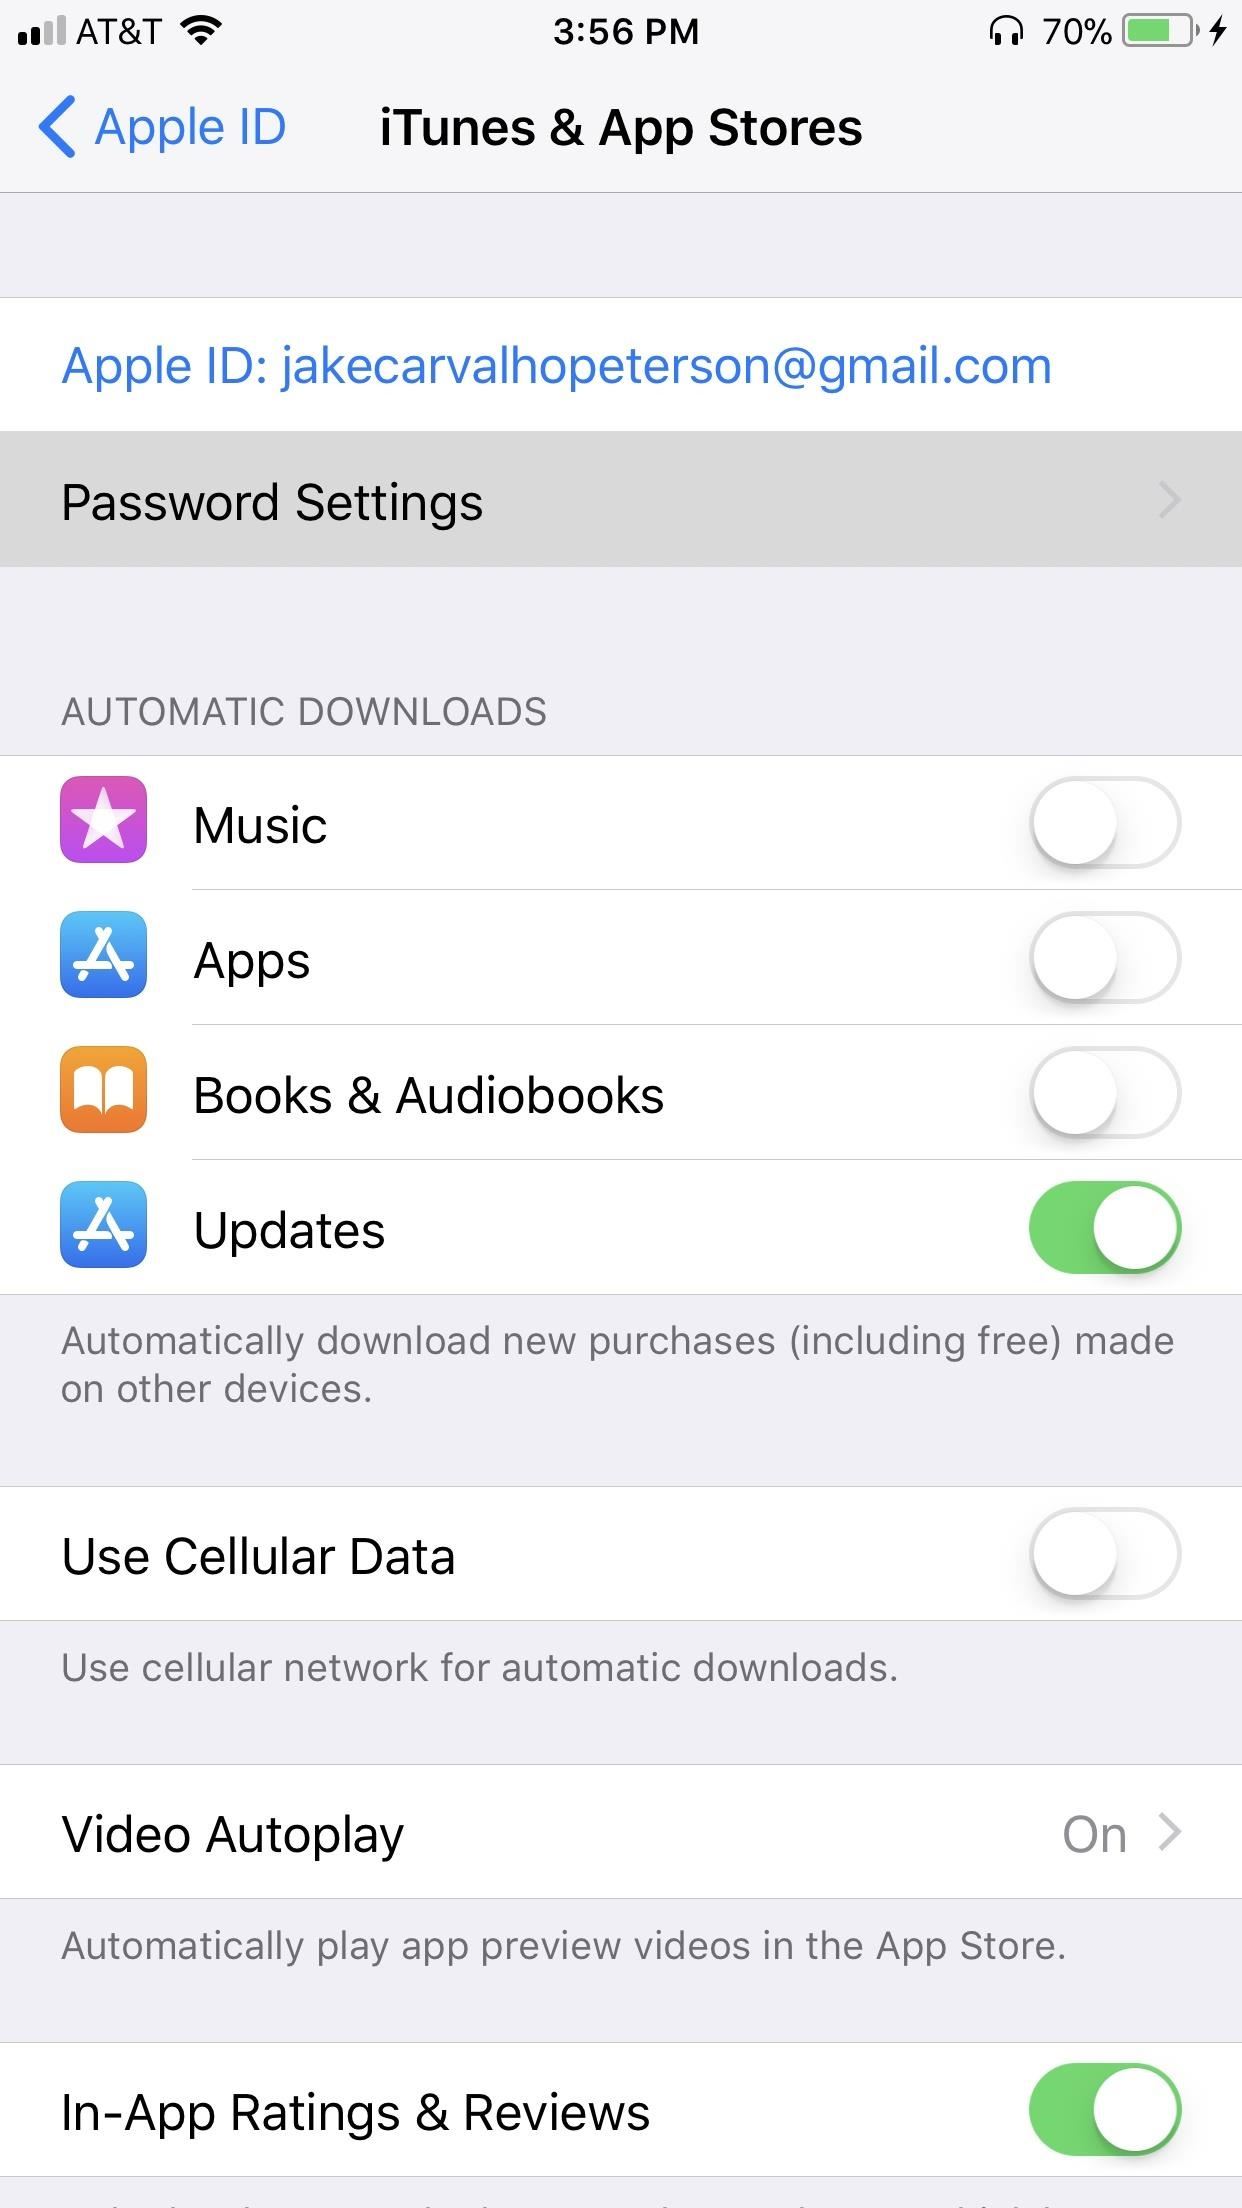
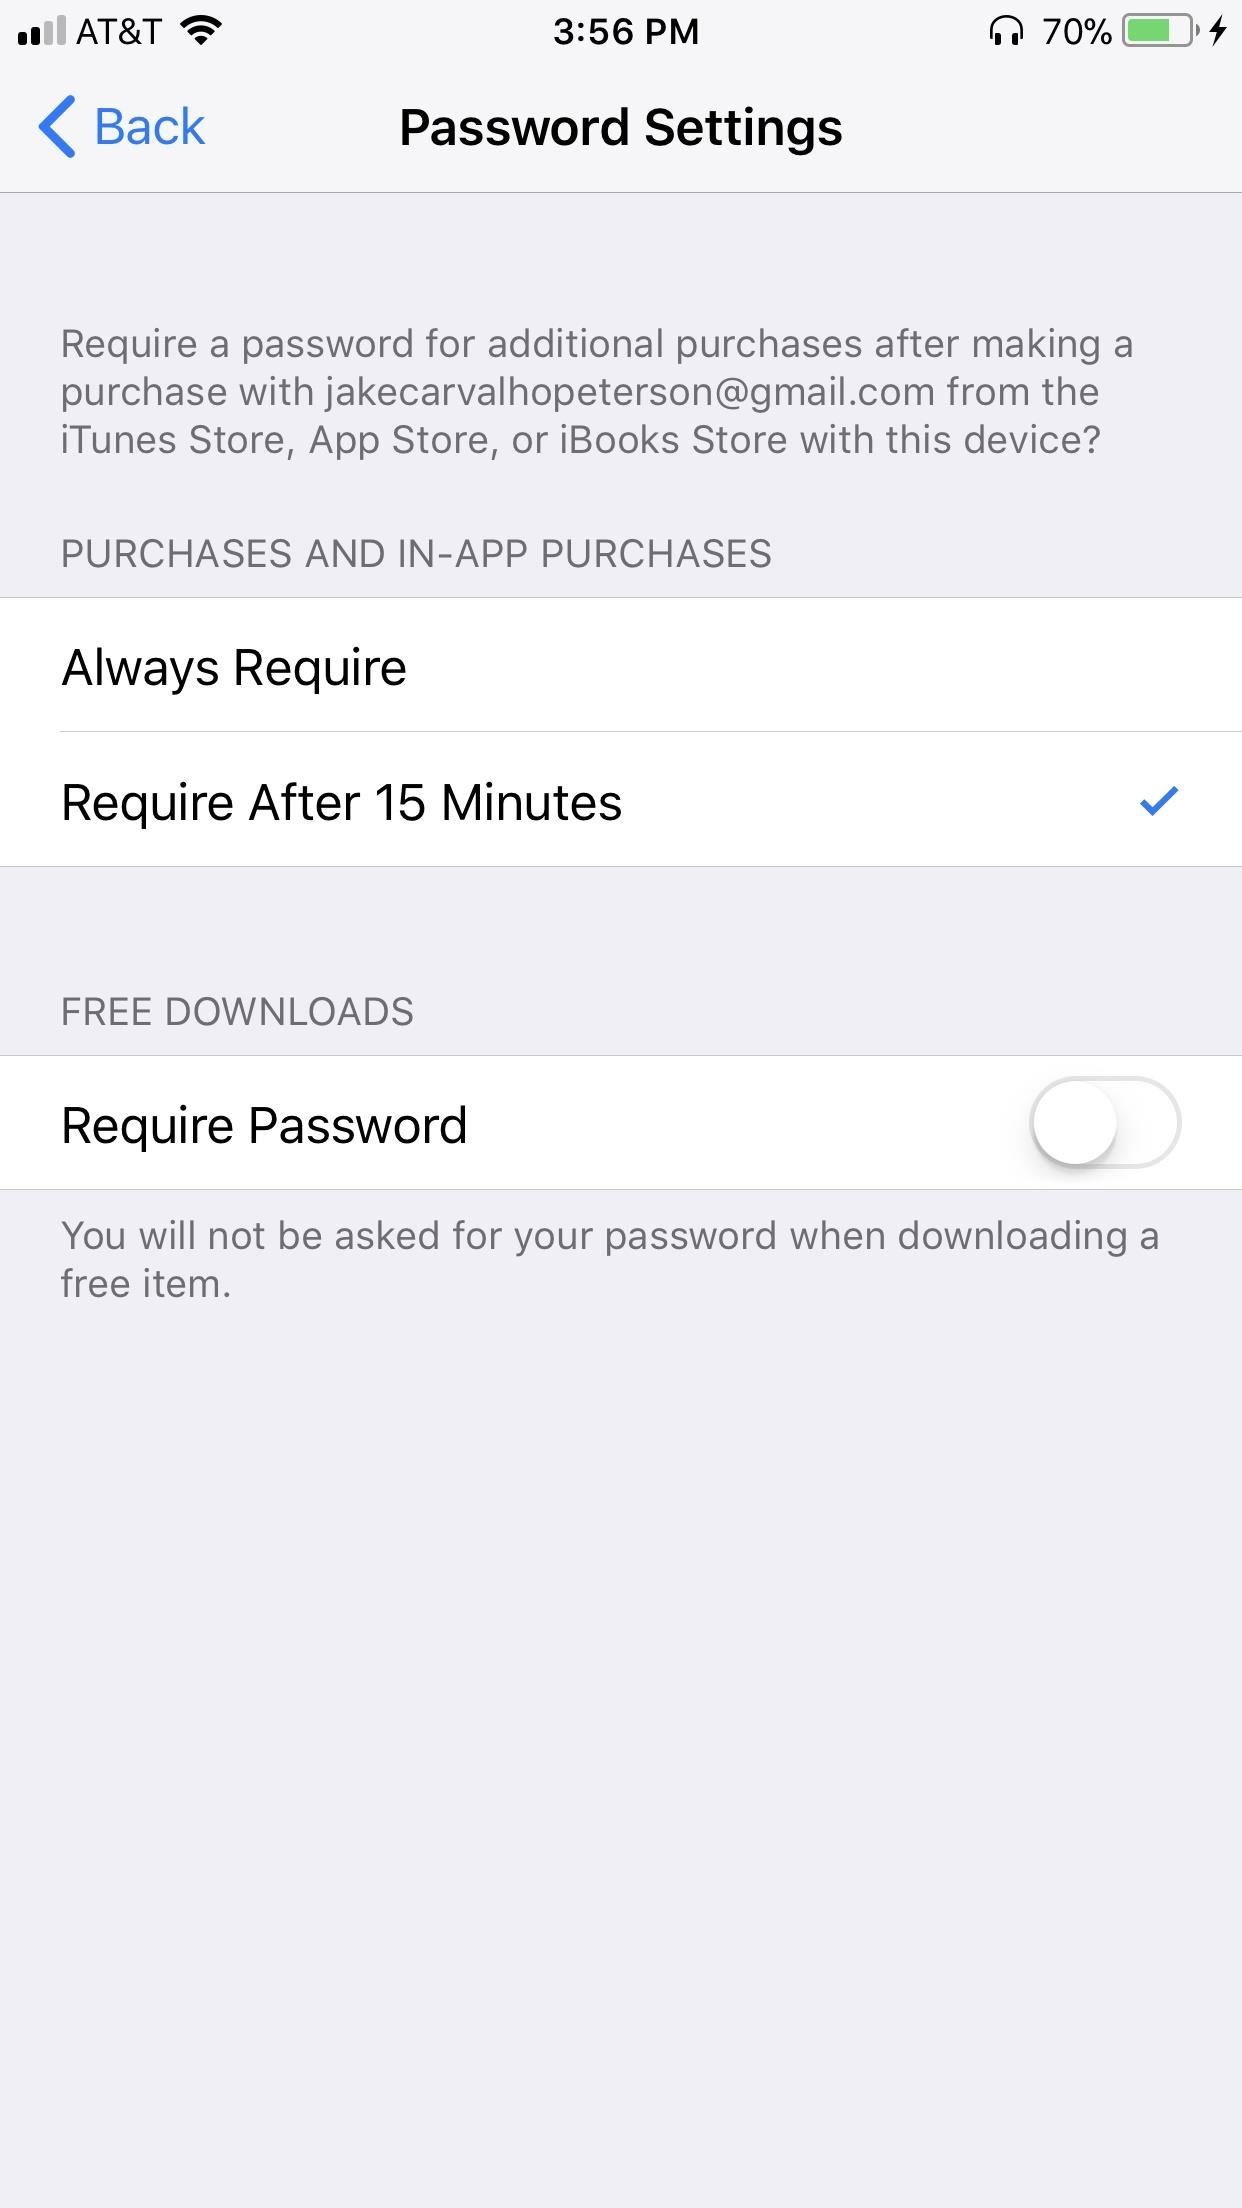
If you don’t use Touch ID, tap on your name at the top of the Settings page. Then, go to iTunes & App Stores –> Password Settings. Set the preference to „Always Require“ for maximum security. As an added option, you also have the ability to always require a password for free downloads by toggling the security measure on.
29. Frequently Auto-Delete Messages
As far as deleting older conversations within the Messages app, Apple permanently stores all your messages on your iPhone by default and largely leaves it up to you to delete them manually. Even if you have Messages in iCloud enabled, messages will still be stored locally. As such, erasing conversations can be a tedious process, especially if you’re concerned about your privacy and have made manually cleaning out your older texts a part of your monthly routine.
Thankfully, your iPhone has a feature that lets you automate the process of deleting old messages and set your device to remove older conversations after a certain period of time. To do so, just jump over to Settings –> Messages –> Keep Messages. Choose either „30 Days“ or „1 Year,“ and your iPhone will make sure your messages never see a day beyond that time.


For more information on permanently deleting texts from your iPhone, check out the guide below.
30. Disable Access to Apps When Locked
By default, your lock screen contains a treasure trove of personal data like recent notifications, your Wallet, and the Today View, which is a collection of widgets of your most useful apps. Fortunately, many of the apps that contain this info can be specifically disabled from the lock screen by going to the „Touch ID & Passcode“ menu (or „Face ID & Passcode“ on iPhone X) within the Settings app.
From there, you can choose which apps you’d like to prevent access to from your lock screen. If you’d rather not have others see your texts, emails, or app alerts, or if you’d prefer people not see information from your apps in the Today View, you can disable those apps and features here.


